How to Update Node.js Versions on Linux

Updating Node.js on Linux can be as simple as installing a new version—but a safe Node.js upgrade is more than changing the number returned by node -v.
A new major version can change the V8 engine, npm, OpenSSL, runtime APIs, native addon compatibility, dependency requirements, and application behavior.
In this guide, we'll show you the best ways to update Node.js on Linux, how to choose the right version, and what to check before moving an application to a newer runtime.
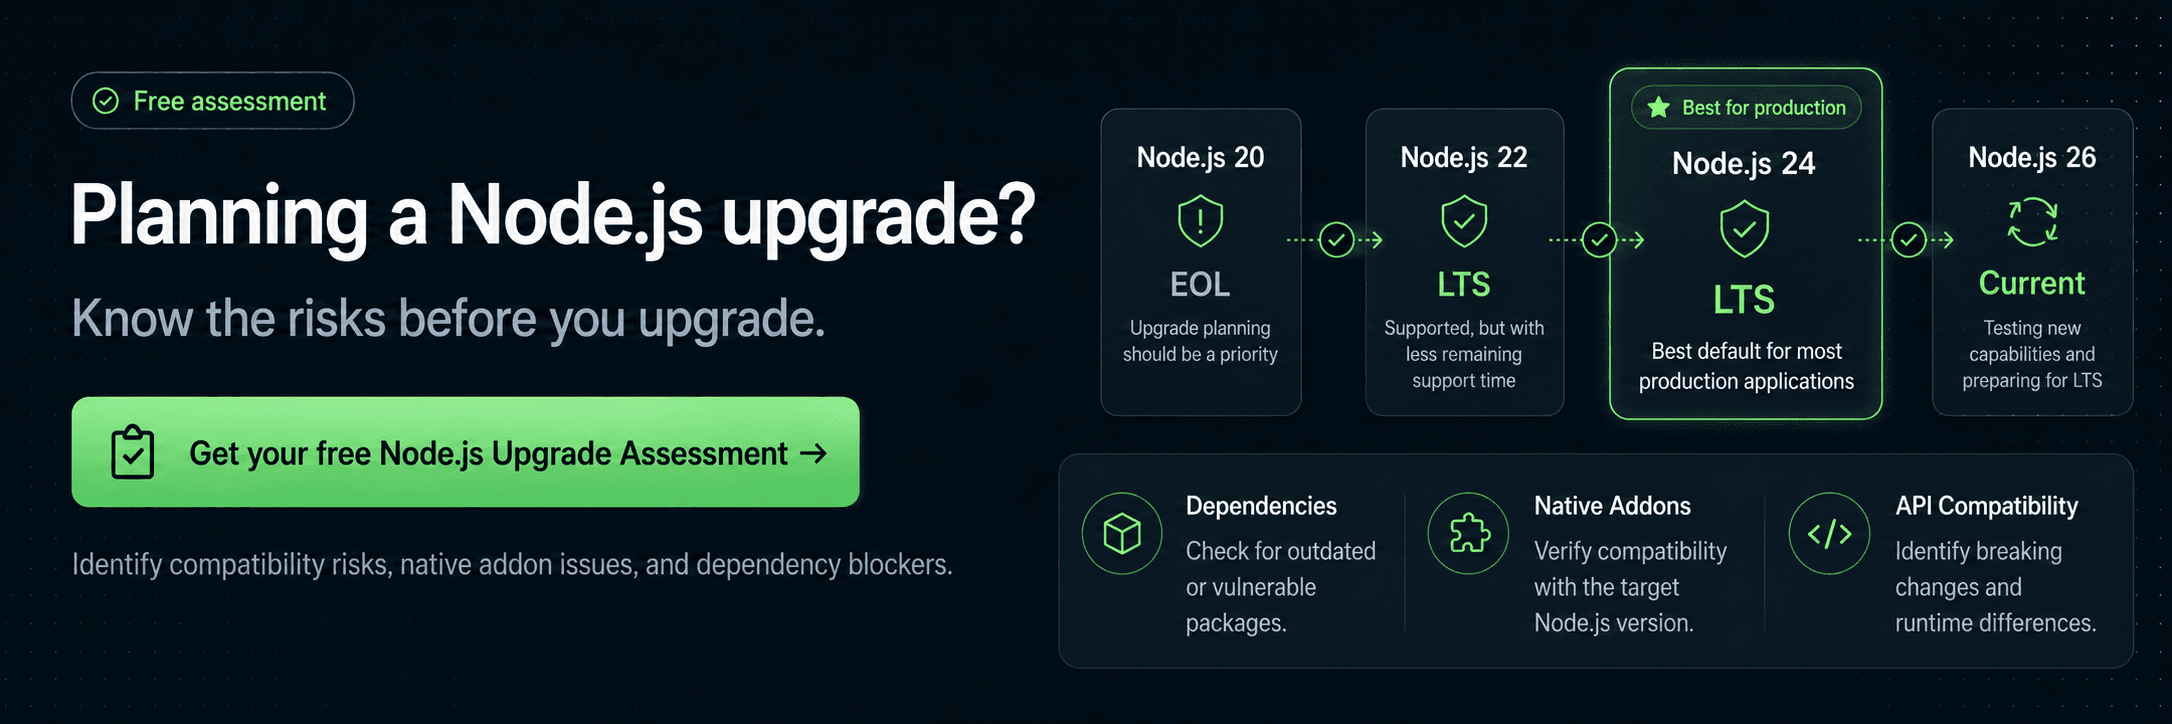
Get your free Node.js Upgrade Assessment →
Before you upgrade, check your application
Run NodeSource's free Upgrade Discovery CLI:
npx @nodesource/upgrade
It analyzes your dependencies, native C/C++ addons, and static Node.js API usage locally to help identify potential upgrade blockers before you change the runtime.
Using another operating system?
Looking for instructions for macOS? Click here. Need help with Windows? Click here.
First: Which Node.js Version Should You Install?
Before updating anything, it helps to understand that the latest Node.js version is not always the version you should use in production.
As of August 2026, the official Node.js releases page lists:
| Release | Status | When to use it |
|---|---|---|
| Node.js 24 | Active LTS | Best default for most production applications |
| Node.js 26 | Current | Testing new capabilities and preparing for its LTS promotion |
| Node.js 22 | Maintenance LTS | Still supported, but with less remaining support time |
| Node.js 20 and earlier | EOL | Upgrade planning should be a priority |
At the time of this update, the latest releases are Node.js 24.19.0 LTS and Node.js 26.7.0 Current. Always check nodejs.org before installing, since patch releases change frequently.
For production applications, the Node.js project recommends using an Active LTS or Maintenance LTS release.
If your application is still running Node.js 20 or an older release, upgrading becomes more important: End-of-Life versions no longer receive community security fixes.
We cover those risks in much more detail here:
Node.js Versions Explained: Why Running an Outdated Release Is a Business Risk
Prefer a quick video explanation?
- LTS vs Current — What's the Difference in Node.js?
- How Many Node.js Versions Exist? LTS, Current & Release Cycle Explained
One important release-cycle change
Node.js 26 is also the last release under the historical even/odd release model.
Starting with Node.js 27, Node.js is moving to one major release per year, and every major version is expected to progress toward LTS after its Current phase. The new schedule introduces an Alpha phase, followed by Current and then LTS.
You can follow the official Node.js release schedule for the latest lifecycle information.
Before You Start: Check What You Are Running
Open your terminal and run:
node -v
npm -v
You can also check which Node.js executable Linux is actually using:
command -v node
If you have installed Node.js using more than one method, you may discover that the runtime being executed is not the one you expected.
For example, you could have Node.js installed through:
- apt
- dnf or yum
- NodeSource binary distributions
- nvm
- A manually installed Node.js binary
- A development container or Docker image
To see every Node.js executable available through your current PATH, run:
which -a node
If this is an existing application, also check whether the project defines a Node.js version in an .nvmrc file:
cat .nvmrc
You may also find a Node.js requirement in package.json:
{
  "engines": {
    "node": ">=24"
  }
}
And before changing your runtime, make sure your work is committed so you can easily compare or revert application changes.
The important distinction is this:
Updating Node.js on your Linux machine and upgrading the Node.js version used by your application are related, but they are not necessarily the same thing.
Your local installation may be ready for Node.js 24 or 26 while your application's dependencies, CI pipeline, Docker images, deployment configuration, or production environment still expect an older version.
The Best Ways to Update Node.js on Linux
There is no single installation method that works best for every Linux environment.
A simple rule is:
| Method | Best for |
|---|---|
| NodeSource Binary Distributions | System-wide installations, servers, CI environments, and DEB/RPM-based systems |
| nvm | Developers working across multiple Node.js versions |
| Linux distribution packages | Simple installations where the distribution-provided Node.js version is acceptable |
| Manual Node.js binaries | Advanced users who need direct control over installation paths and binaries |
For local development, using a version manager such as nvm is usually the most flexible option.
For servers and system-wide installations on Debian-, Ubuntu-, RHEL-, Fedora-, and other supported DEB/RPM-based systems, NodeSource binary distributions provide another convenient option.
Method 1: Update Node.js Using NodeSource Binary Distributions
NodeSource maintains Node.js binary distributions for Linux through common DEB and RPM package formats.
This allows you to install Node.js through your operating system's package manager while choosing the Node.js major version you want to run.
A useful advantage of this approach is predictability: instead of installing whatever Node.js version your Linux distribution currently provides, you can explicitly configure the NodeSource repository for a specific major release.
For example:
setup_24.x → Node.js 24
setup_26.x → Node.js 26
Using an explicit major version is particularly useful for servers, CI environments, and installation documentation because it prevents your target major from changing automatically later.
NodeSource currently provides setup scripts for both Node.js 24 and Node.js 26 across its DEB and RPM distributions.
Debian and Ubuntu
For most production applications, you will probably want Node.js 24 LTS.
First, make sure curl is installed:
sudo apt update
sudo apt install -y curl
Download the NodeSource setup script:
curl -fsSL https://deb.nodesource.com/setup_24.x -o nodesource_setup.sh
Run it:
sudo -E bash nodesource_setup.sh
Then install Node.js:
sudo apt install -y nodejs
Verify the installation:
node -v
npm -v
The NodeSource setup script configures the repository and signing key before Node.js is installed through apt.
Installing Node.js 26 Current instead
If you intentionally want the Current release, change the repository target:
curl -fsSL https://deb.nodesource.com/setup_26.x -o nodesource_setup.sh
sudo -E bash nodesource_setup.sh
sudo apt install -y nodejs
Then verify:
node -v
You should now be running a Node.js 26 release.
Updating within the same major version
If your machine is already configured for Node.js 24 through NodeSource, regular package updates can install newer Node.js 24 patch or minor releases:
sudo apt update
sudo apt install --only-upgrade nodejs
The important difference is:
- 24.18.x → 24.19.x: normal package update within the same major
- 22.x → 24.x: major Node.js upgrade
- 24.x → 26.x: major Node.js upgrade
Major upgrades deserve additional application compatibility testing.
RHEL, Fedora, Amazon Linux, and RPM-Based Distributions
For RPM-based distributions, NodeSource provides a separate repository setup.
To configure Node.js 24 LTS:
curl -fsSL https://rpm.nodesource.com/setup_24.x -o nodesource_setup.sh
sudo bash nodesource_setup.sh
Then install Node.js using dnf on modern distributions:
sudo dnf install -y nodejs
On environments that use yum, run:
sudo yum install -y nodejs
Verify:
node -v
npm -v
Installing Node.js 26 Current
If you specifically need Node.js 26:
curl -fsSL https://rpm.nodesource.com/setup_26.x -o nodesource_setup.sh
sudo bash nodesource_setup.sh
sudo dnf install -y nodejs
Or, on a yum-based system:
sudo yum install -y nodejs
The current NodeSource RPM setup scripts include the repository configuration needed to install Node.js through RPM-based package managers.
What About setup_lts.x and setup_current.x?
NodeSource also provides convenience scripts such as:
setup_lts.x
setup_current.x
These can be useful when you deliberately want whatever NodeSource currently defines as LTS or Current.
However, there is an important difference.
This:
https://deb.nodesource.com/setup_24.x
always targets the Node.js 24 release line.
This:
https://deb.nodesource.com/setup_lts.x
can point to a different major version in the future.
For local experimentation that may be fine. For long-lived documentation, deployment scripts, Docker builds, or CI infrastructure, pinning the desired major version is usually easier to reason about.
Method 2: Update Node.js Using nvm
nvm is a Node.js version manager that allows you to install and switch between multiple Node.js versions without replacing the system-wide installation.
This is especially useful if you maintain several projects.
For example:
Project A → Node.js 22
Project B → Node.js 24
Experimental project → Node.js 26
All three versions can exist on the same Linux machine.
Step 1: Install or Update nvm
The current nvm installation documentation uses version v0.40.6.
Run:
curl -o- https://raw.githubusercontent.com/nvm-sh/nvm/v0.40.6/install.sh | bash
Then reopen your terminal.
Depending on your shell, you can also reload its configuration directly.
For Bash:
source ~/.bashrc
For Zsh:
source ~/.zshrc
Check that nvm is available:
command -v nvm
If everything is configured correctly, the command should return:
nvm
Step 2: Install Node.js LTS
For most development environments, LTS is a good default:
nvm install --lts
Then use it:
nvm use --lts
You can also explicitly install Node.js 24:
nvm install 24
nvm use 24
nvm currently supports installing and switching between Node.js major versions directly from the command line.
Step 3: Set Your Default Version
To make Node.js 24 your default for new terminal sessions:
nvm alias default 24
Verify:
node -v
Installing Node.js 26 with nvm
If you want to test the Current release:
nvm install 26
nvm use 26
You can switch back whenever necessary:
nvm use 24
That ability to move between runtime versions is one of the biggest advantages of using a version manager during an upgrade.
Use .nvmrc to Keep Your Team Consistent
If a project is expected to use Node.js 24, you can define that version in .nvmrc.
For example:
echo "24" > .nvmrc
Then developers can enter the project and run:
nvm use
If the version is not installed yet:
nvm install
This helps make the expected Node.js major version visible inside the repository instead of relying only on each developer's machine configuration.
Method 3: Install Node.js Manually from Official Linux Binaries
Node.js also publishes prebuilt Linux binaries directly through nodejs.org.
Manual installation can be useful when you need precise control over:
- The exact Node.js version
- Installation location
- Architecture
- PATH configuration
- Environments where another package manager is not appropriate
However, it also means you are responsible for future updates and configuration.
For most developers, nvm or a package-based installation will be easier to maintain.
Step 1: Check Your Architecture
Run:
uname -m
Common results include:
x86_64
aarch64
Typically:
x86_64 → x64
aarch64 → arm64
Make sure you download the binary that matches your system.
Step 2: Download Node.js
For example, the Node.js 24.19.0 release includes Linux binaries for x64, ARM64, ppc64le, and s390x architectures.
For Linux x64:
curl -O https://nodejs.org/dist/v24.19.0/node-v24.19.0-linux-x64.tar.xz
Download the official checksum file as well:
curl -O https://nodejs.org/dist/v24.19.0/SHASUMS256.txt
Step 3: Verify the Download
Before extracting the binary, verify its SHA-256 checksum:
grep "node-v24.19.0-linux-x64.tar.xz" SHASUMS256.txt | sha256sum -c -
If verification succeeds, you should see:
node-v24.19.0-linux-x64.tar.xz: OK
Node.js publishes SHASUMS256.txt alongside its release binaries for this purpose.
Step 4: Extract the Archive
Extract the downloaded file:
tar -xJf node-v24.19.0-linux-x64.tar.xz
You can then place it in a directory dedicated to manually installed runtimes, for example:
sudo mkdir -p /usr/local/lib/nodejs
sudo mv node-v24.19.0-linux-x64 /usr/local/lib/nodejs/
Add the Node.js binary directory to your PATH:
export PATH=/usr/local/lib/nodejs/node-v24.19.0-linux-x64/bin:$PATH
To persist this configuration, add the same line to your shell profile, such as:
~/.bashrc
or:
~/.zshrc
Then reload your shell and verify:
node -v
npm -v
Be careful with multiple installations
Manual installations can create confusing PATH situations if Node.js is already installed using apt, dnf, yum, or nvm.
After installing, check:
command -v node
which -a node
This tells you which binary is actually being executed.
Should You Use Your Linux Distribution's Default Node.js Package?
Many Linux distributions also provide Node.js directly through their standard repositories.
For example:
sudo apt install nodejs
or:
sudo dnf install nodejs
can install Node.js without configuring an additional repository.
The tradeoff is that the Node.js version provided by your distribution may not match the Node.js major version you want for your application.
Before installing, check what version your package manager offers.
On Debian or Ubuntu:
apt policy nodejs
On RPM-based systems:
dnf info nodejs
If the available version matches your application's requirements and support expectations, the distribution package may be perfectly adequate.
If you need a specific supported Node.js release line, a version manager or explicitly configured NodeSource repository gives you more control.
After the Upgrade: Verify More Than node -v
Once Node.js has been updated, start with:
node -v
npm -v
command -v node
But don't stop there.
The fact that Node.js launches successfully does not mean your application is automatically compatible with the new runtime.
Go to your project and reinstall dependencies if your upgrade process requires it:
npm install
Or, when your lockfile is authoritative:
npm ci
Then run the application's normal validation workflow.
For example:
npm test
npm run lint
npm run build
And finally start the application:
npm start
The exact commands depend on your project, but the goal is the same: exercise the application under the new Node.js runtime before promoting that runtime to production.
Pay Special Attention to Native Addons
One of the areas most likely to require attention during a major Node.js upgrade is native code.
Some npm packages include native C or C++ addons that interact with Node.js through APIs such as Node-API or V8-facing interfaces.
After changing Node.js versions, you may need to rebuild native dependencies:
npm rebuild
In other situations, upgrading the dependency itself may be necessary.
This is also one of the areas the NodeSource Upgrade Discovery CLI can help identify before the runtime change:
npx @nodesource/upgrade
Catching native addon risk before deployment is much easier than discovering it when an application fails to start in production.
Common Problem: node -v Still Shows the Old Version
This usually means the shell is finding another Node.js executable first.
Run:
which -a node
You may see something like:
/home/user/.nvm/versions/node/v22.x.x/bin/node
/usr/bin/node
/usr/local/bin/node
The first matching path generally wins.
You can inspect your PATH with:
echo $PATH
If you're using nvm, explicitly activate the desired version:
nvm use 24
Then check again:
command -v node
node -v
Avoid randomly deleting Node.js binaries until you know how each version was installed.
Remove or update them using the same tool that originally installed them whenever possible.
Common Problem: Global npm Packages Disappeared
If you use nvm, global npm packages are installed separately for each Node.js version.
So after moving from one major to another, commands installed globally under your previous Node.js version may no longer appear.
Check your global packages:
npm list -g --depth=0
In many modern projects, relying on project-local dependencies through package.json and commands such as npx is preferable to depending heavily on globally installed packages.
Common Problem: Your Application Works Locally but CI Still Uses the Old Node.js Version
Updating Node.js on your Linux workstation does not automatically update your entire application environment.
Check places such as:
.github/workflows/
Dockerfile
docker-compose.yml
.nvmrc
package.json
CI/CD configuration
cloud runtime settings
For example, your Dockerfile may still contain:
FROM node:20
while your local environment is already using Node.js 24.
The runtime upgrade is complete only when the environments that build, test, and run the application are aligned with the intended Node.js version.
Do You Need to Remove the Old Node.js Version?
Not necessarily.
If you're using nvm, keeping multiple Node.js versions installed is expected.
You can list them with:
nvm ls
And remove a version you no longer need:
nvm uninstall 20
For system-wide package installations, be more careful.
Running:
sudo apt purge nodejs
does not simply clean up an old Node.js major while leaving another package-managed major untouched. It removes the installed nodejs package.
So don't use apt purge nodejs as a generic "remove old versions" step.
If you're moving between NodeSource major release lines, configure the desired repository and install the target package rather than treating each major as a separate side-by-side apt installation.
Which Linux Update Method Should You Choose?
Here's the simplest way to think about it.
Use nvm if:
- You develop multiple Node.js applications
- Different projects require different Node.js versions
- You want to test an upgrade before changing your system runtime
- You frequently switch between LTS and Current
Example:
nvm install 24
nvm use 24
Use NodeSource Binary Distributions if:
- You want a system-wide Node.js installation
- You're configuring a Linux server
- You're using Debian, Ubuntu, RHEL, Fedora, Amazon Linux, or another compatible DEB/RPM environment
- You want to explicitly choose a Node.js major release
Example for Debian/Ubuntu:
curl -fsSL https://deb.nodesource.com/setup_24.x -o nodesource_setup.sh
sudo -E bash nodesource_setup.sh
sudo apt install -y nodejs
Use manual binaries if:
- You have a specialized environment
- You need direct control over installation paths
- You understand how your shell PATH is configured
- You're prepared to manage future updates yourself
For most application developers, nvm provides the easiest upgrade and rollback workflow.
For servers and system-wide Linux installations, NodeSource's DEB and RPM distributions provide a convenient way to target a specific supported Node.js release line.
A Node.js Upgrade Is an Application Change
Changing the Node.js executable is the easy part.
The more important question is whether your application is ready for the new runtime.
Before moving a production application from Node.js 20 or 22 to Node.js 24, or beginning compatibility testing against Node.js 26, check:
- Direct and transitive dependencies
- Native C/C++ addons
- Node.js APIs used by your application
- Package engines requirements
- Tests
- Build tooling
- CI/CD runtime versions
- Docker base images
- Production runtime configuration
You can start that process locally with:
npx @nodesource/upgrade
The NodeSource Upgrade Discovery CLI analyzes your project to surface potential blockers before you begin changing environments.
Get your free Node.js Upgrade Assessment →
Final Thoughts
Updating Node.js on Linux is straightforward once you know which version you need and how your current runtime was installed.
For most production applications in August 2026, Node.js 24 LTS is the safest default.
Node.js 26 Current is useful for evaluating upcoming capabilities, while applications still running Node.js 20 or older should prioritize an upgrade because those release lines are already End-of-Life.
Whichever installation method you choose, remember that a successful:
node -v
is only the beginning.
A safe Node.js upgrade means validating the application, its dependencies, native modules, build process, CI environment, and production runtime together.