Understanding Vulnerabilities in Node.js Applications with N|Solid
In addition to performance monitoring of your Node.js applications in production, N|Solid will also actively monitor for known vulnerabilities in the modules your Node.js applications depend on–again, in production.
This is one of my personal favorite features because it enables you to continuously monitor the security of your applications, even once they’ve passed your normal security checks during your build process.
Imagine, for example, that you run your application through your CI/CD process and use one of the ecosystem tools to check for known security vulnerabilities. You get a green light, zero known vulnerabilities - ship it!
Your app has now been in production for a week. It’s Tuesday, and a new vulnerability in the npm package express is publicly disclosed. Within minutes of the vulnerability being announced, N|Solid will check to see if that vulnerability in Express applies to the specific version of the module that you’re using. If it does, that information will be surfaced in the N|Solid Console and can be relayed to you instantly via Slack or webhook notifications.
N|Solid will monitor for vulnerabilities in production - great! Now, what does N|Solid actually tell you and how can you interpret that information? Let’s dig into N|Solid’s vulnerability monitoring capabilities so you can understand exactly that.
Monitoring Node.js Vulnerabilities in N|Solid
To start monitoring your application for vulnerabilities, you’ll first need to deploy N|Solid as your Node.js application’s runtime. You can find out how to do this on your platform of choice in the N|Solid documentation. Once deployed, you’ll have the N|Solid runtime connected to the N|Solid Console and the runtime will be able to report any known security vulnerabilities directly to the Console’s Security page, which can be accessed from the global navigation:
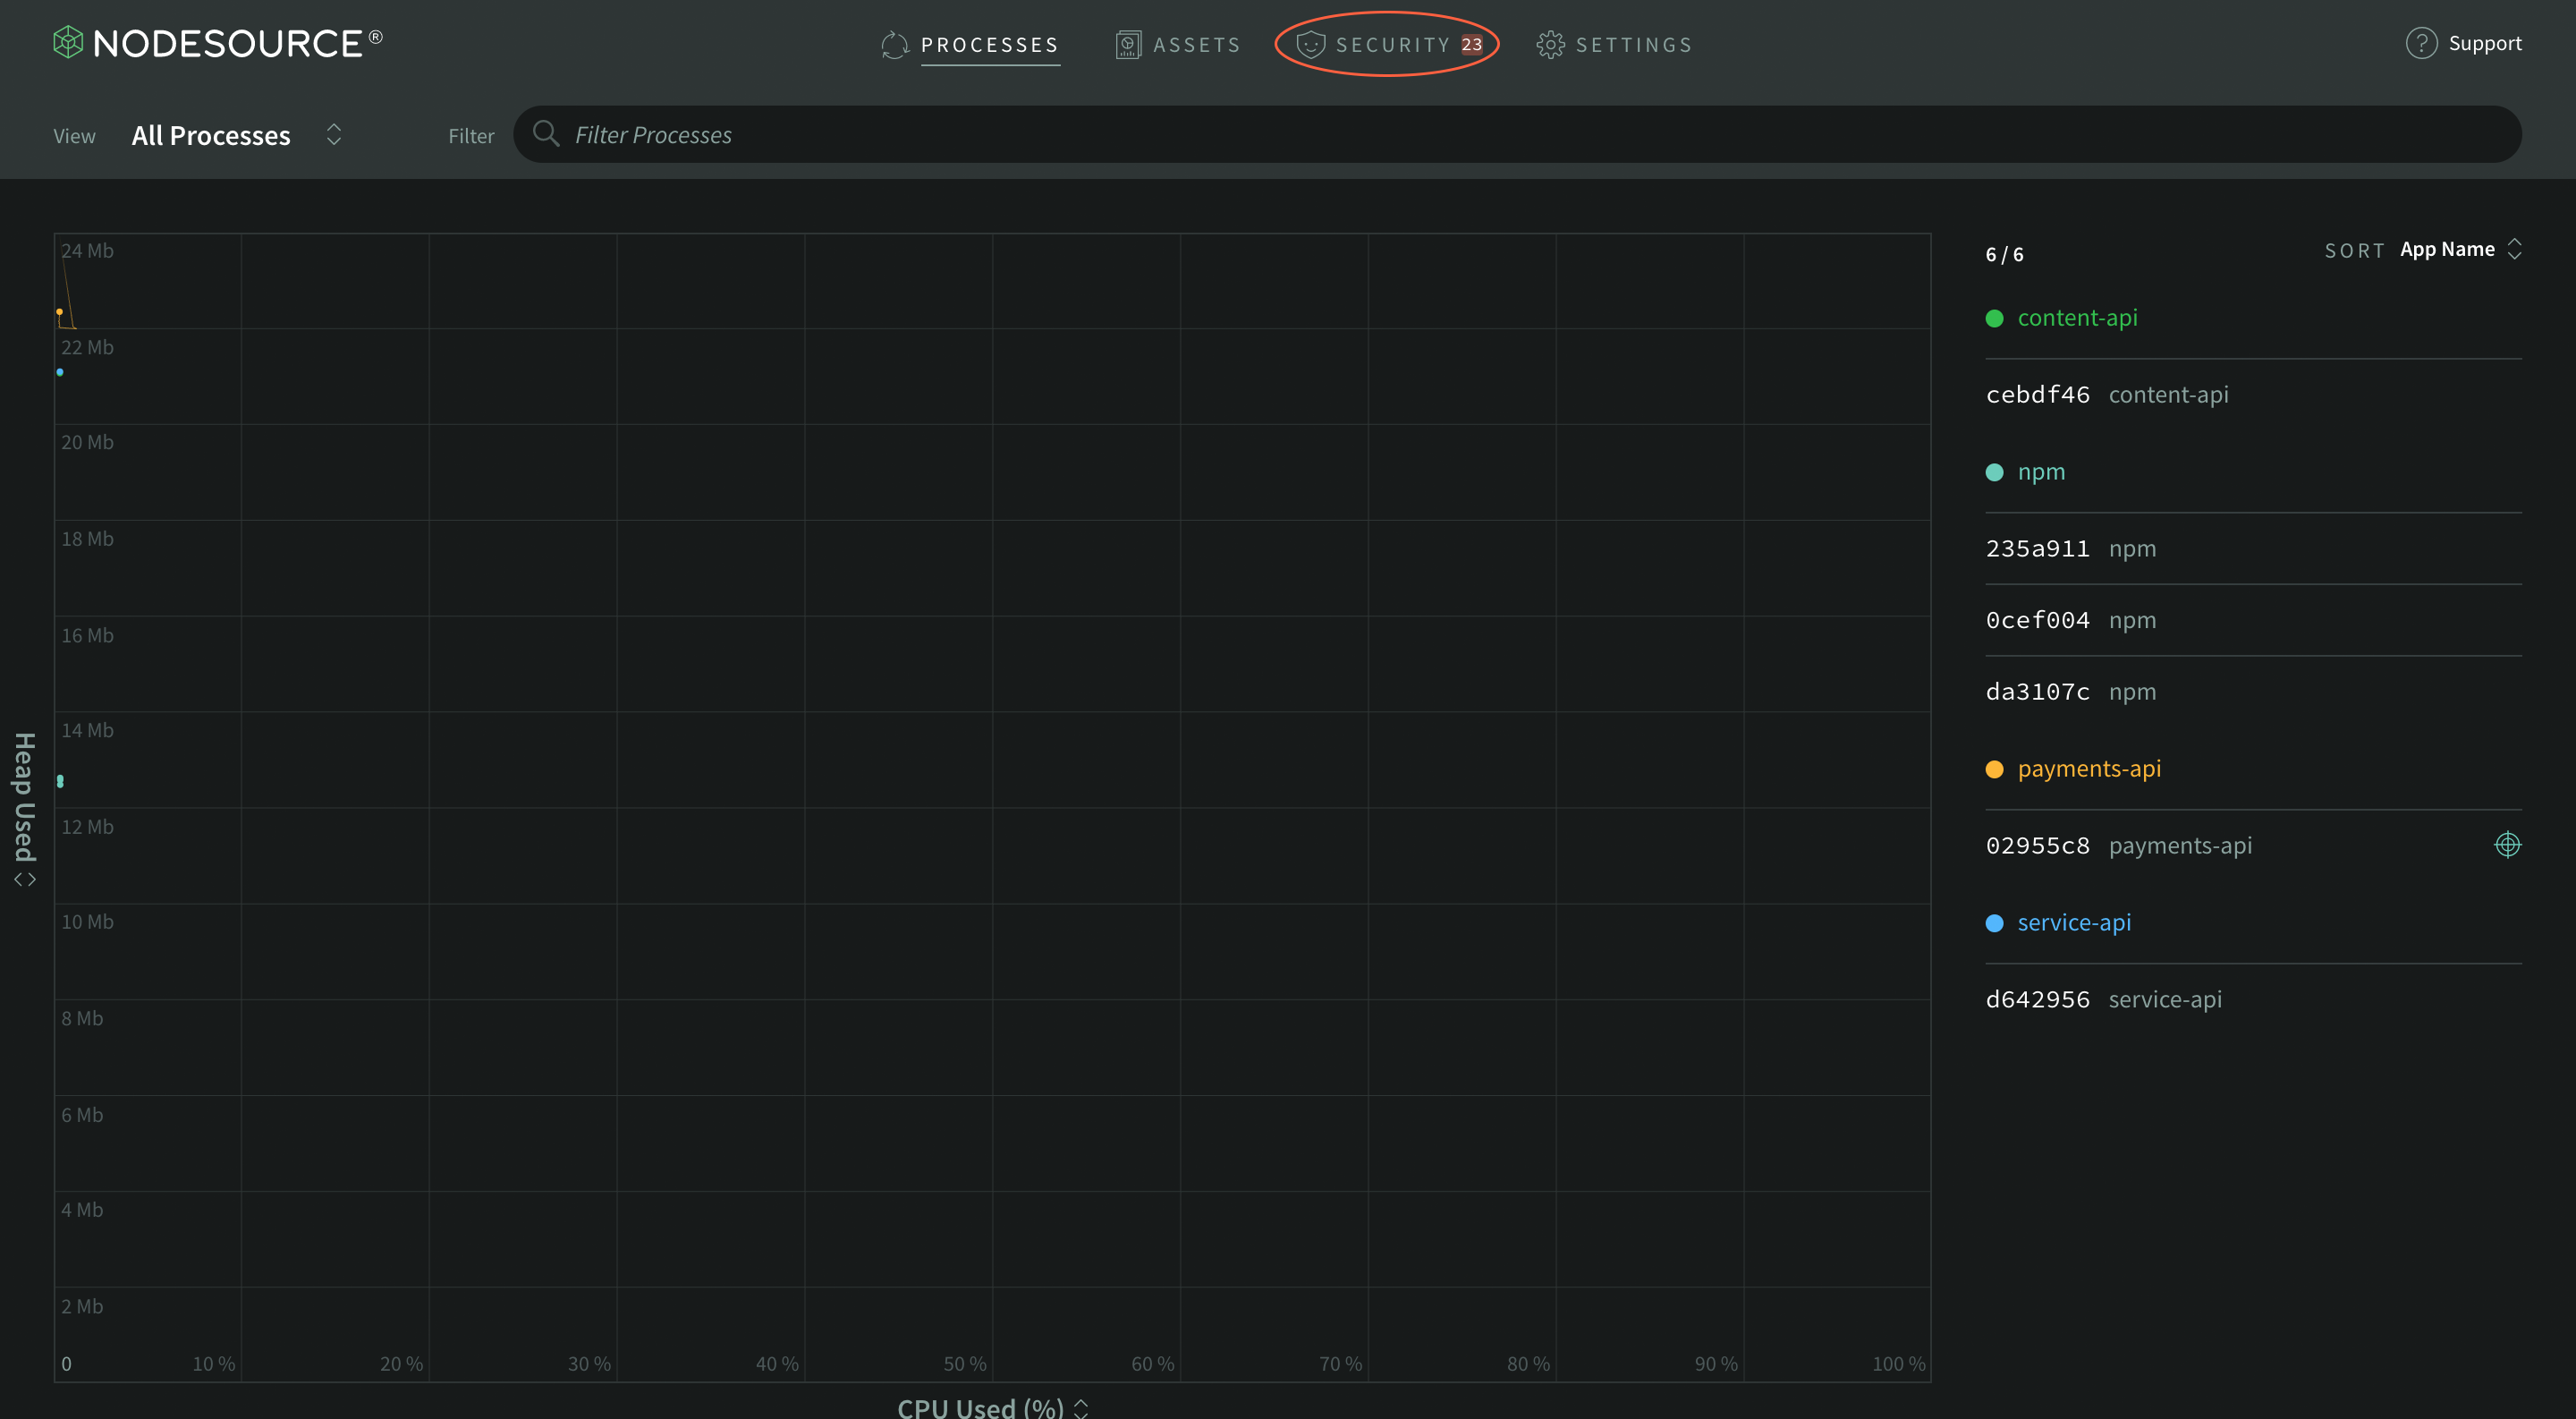
On the Security Vulnerabilities page, you’d ideally see a happy shield indicating you’ve got no modules that have known vulnerabilities like that - that should always be the goal. In reality, you’ll occasionally run into something more like this:
If you don’t see that, you’re likely seeing something very similar to the first screenshot. I’m going to break down the different sections of that page and explain what each bit of it means.
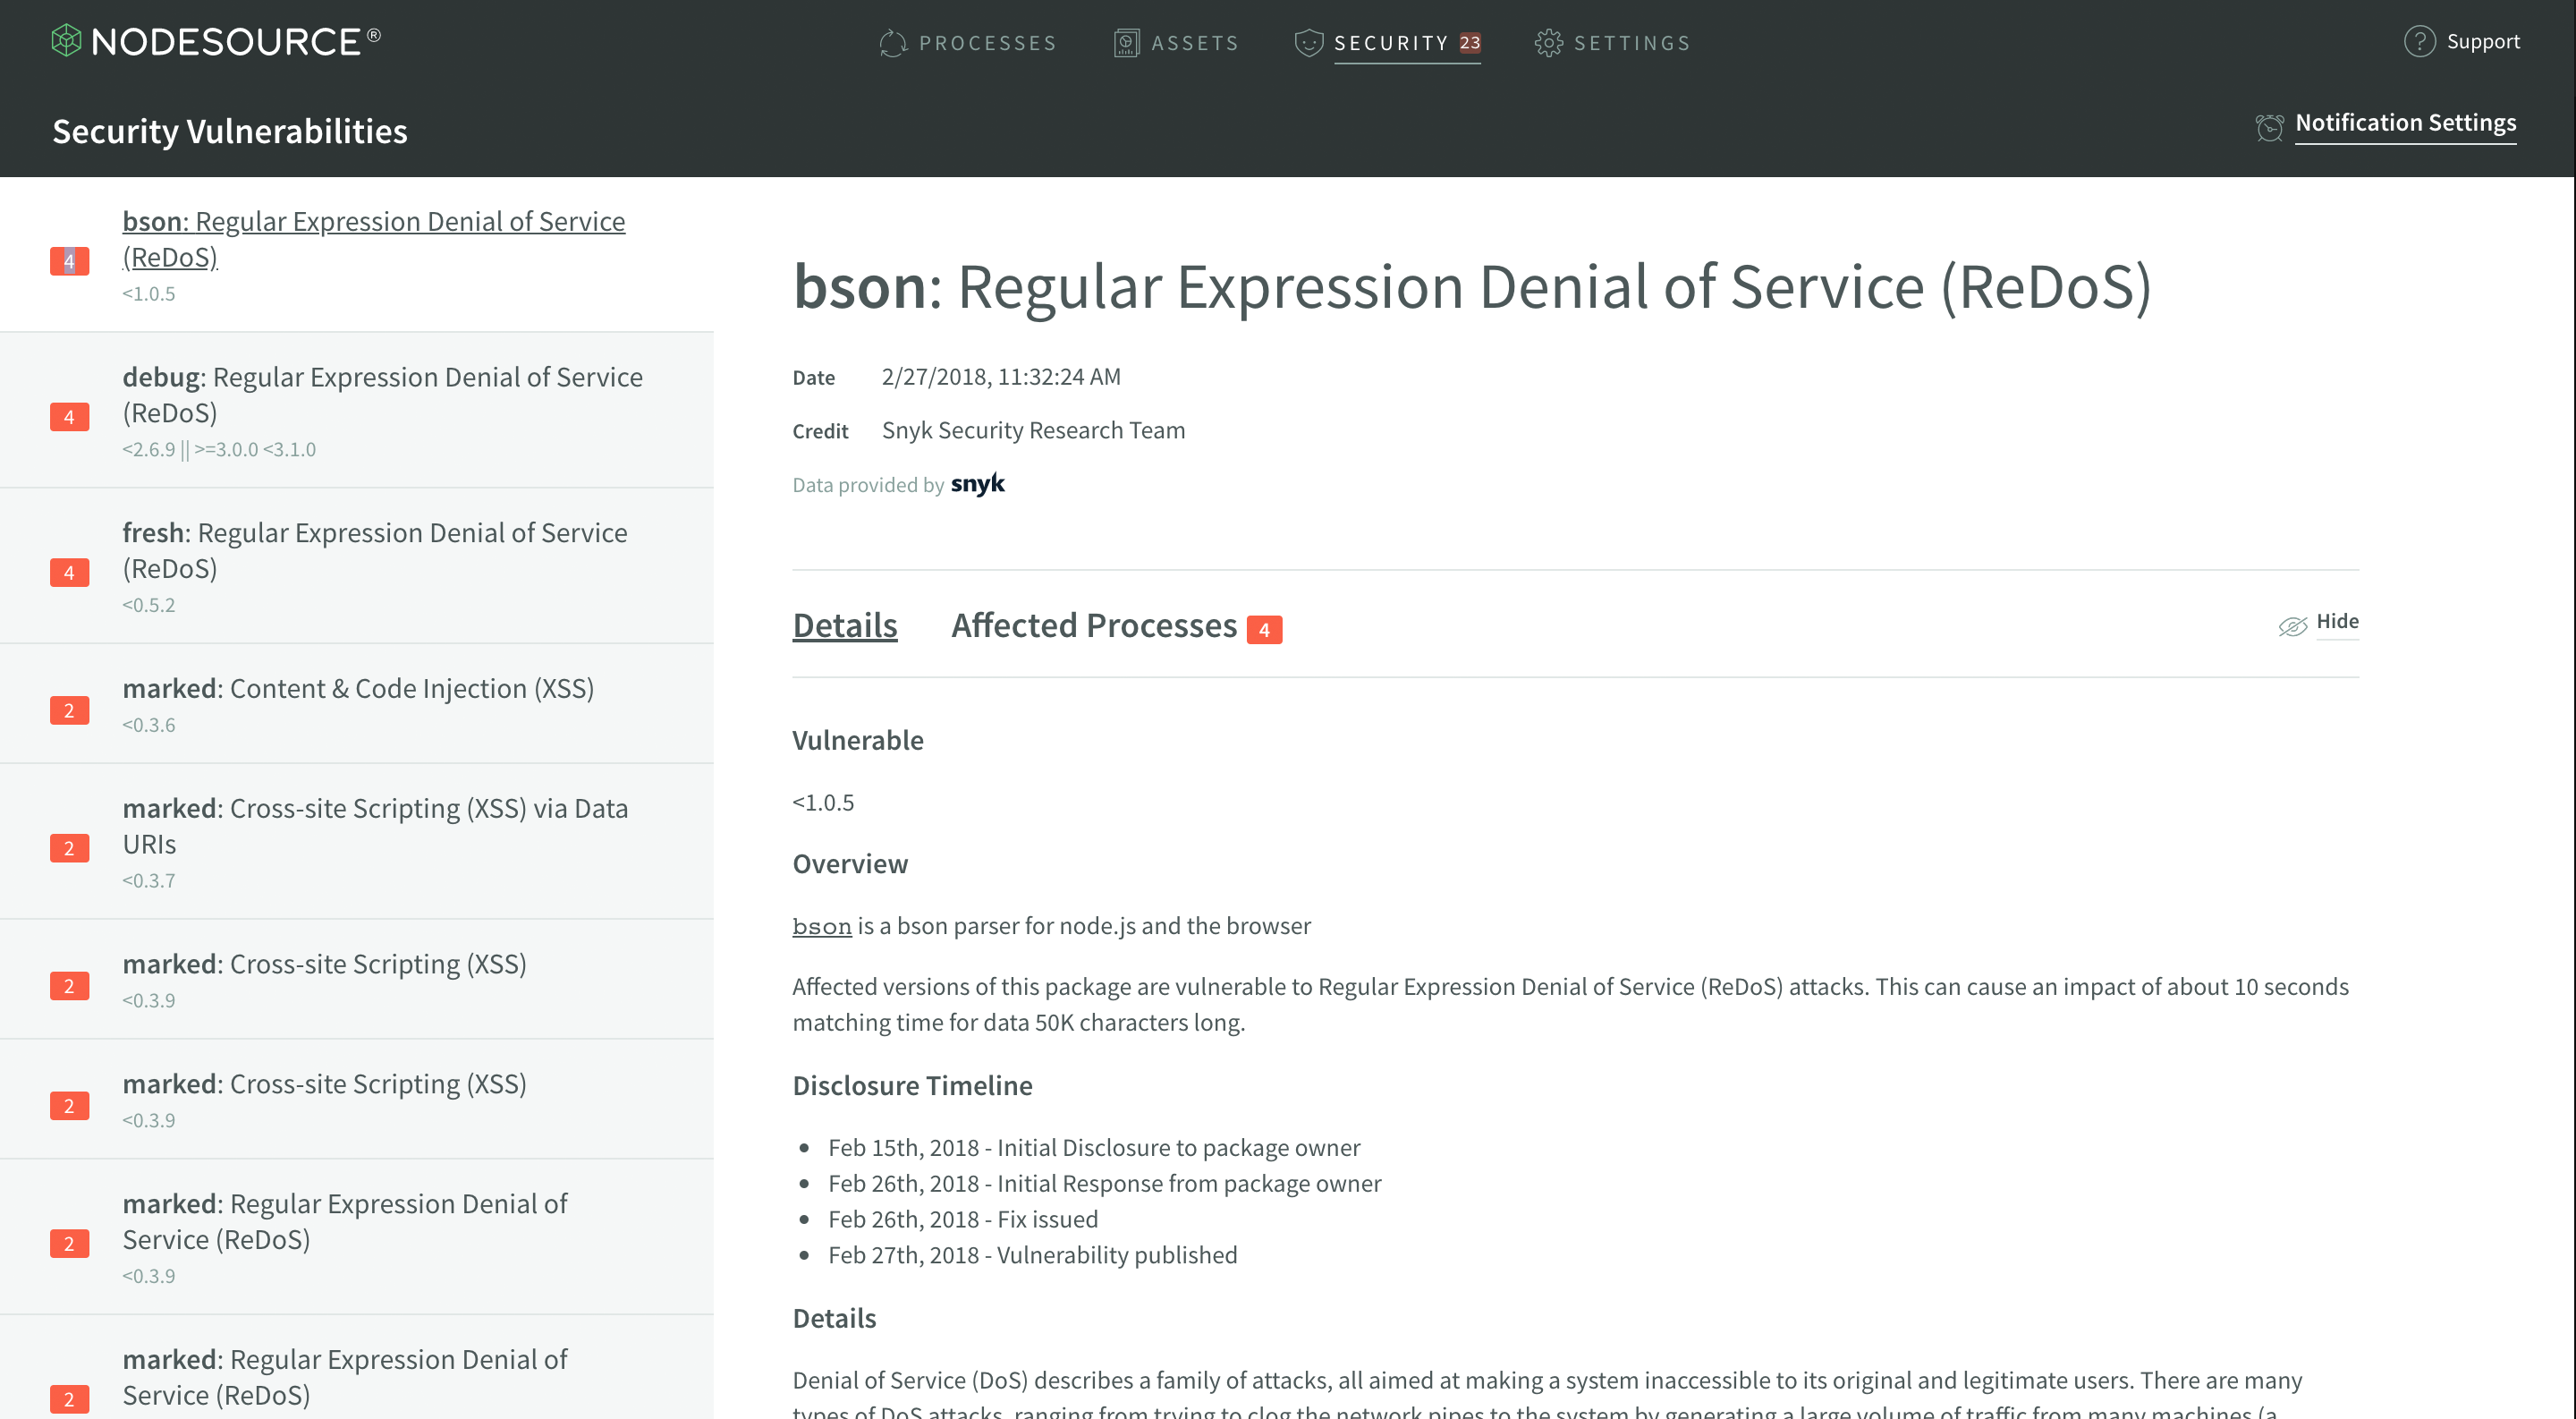
Vulnerabilities List
The vulnerabilities list is the sidebar that lists out each module being actively used in your Node.js processes which has a known vulnerability. This list surfaces a few high level pieces of metadata for you to take note of.
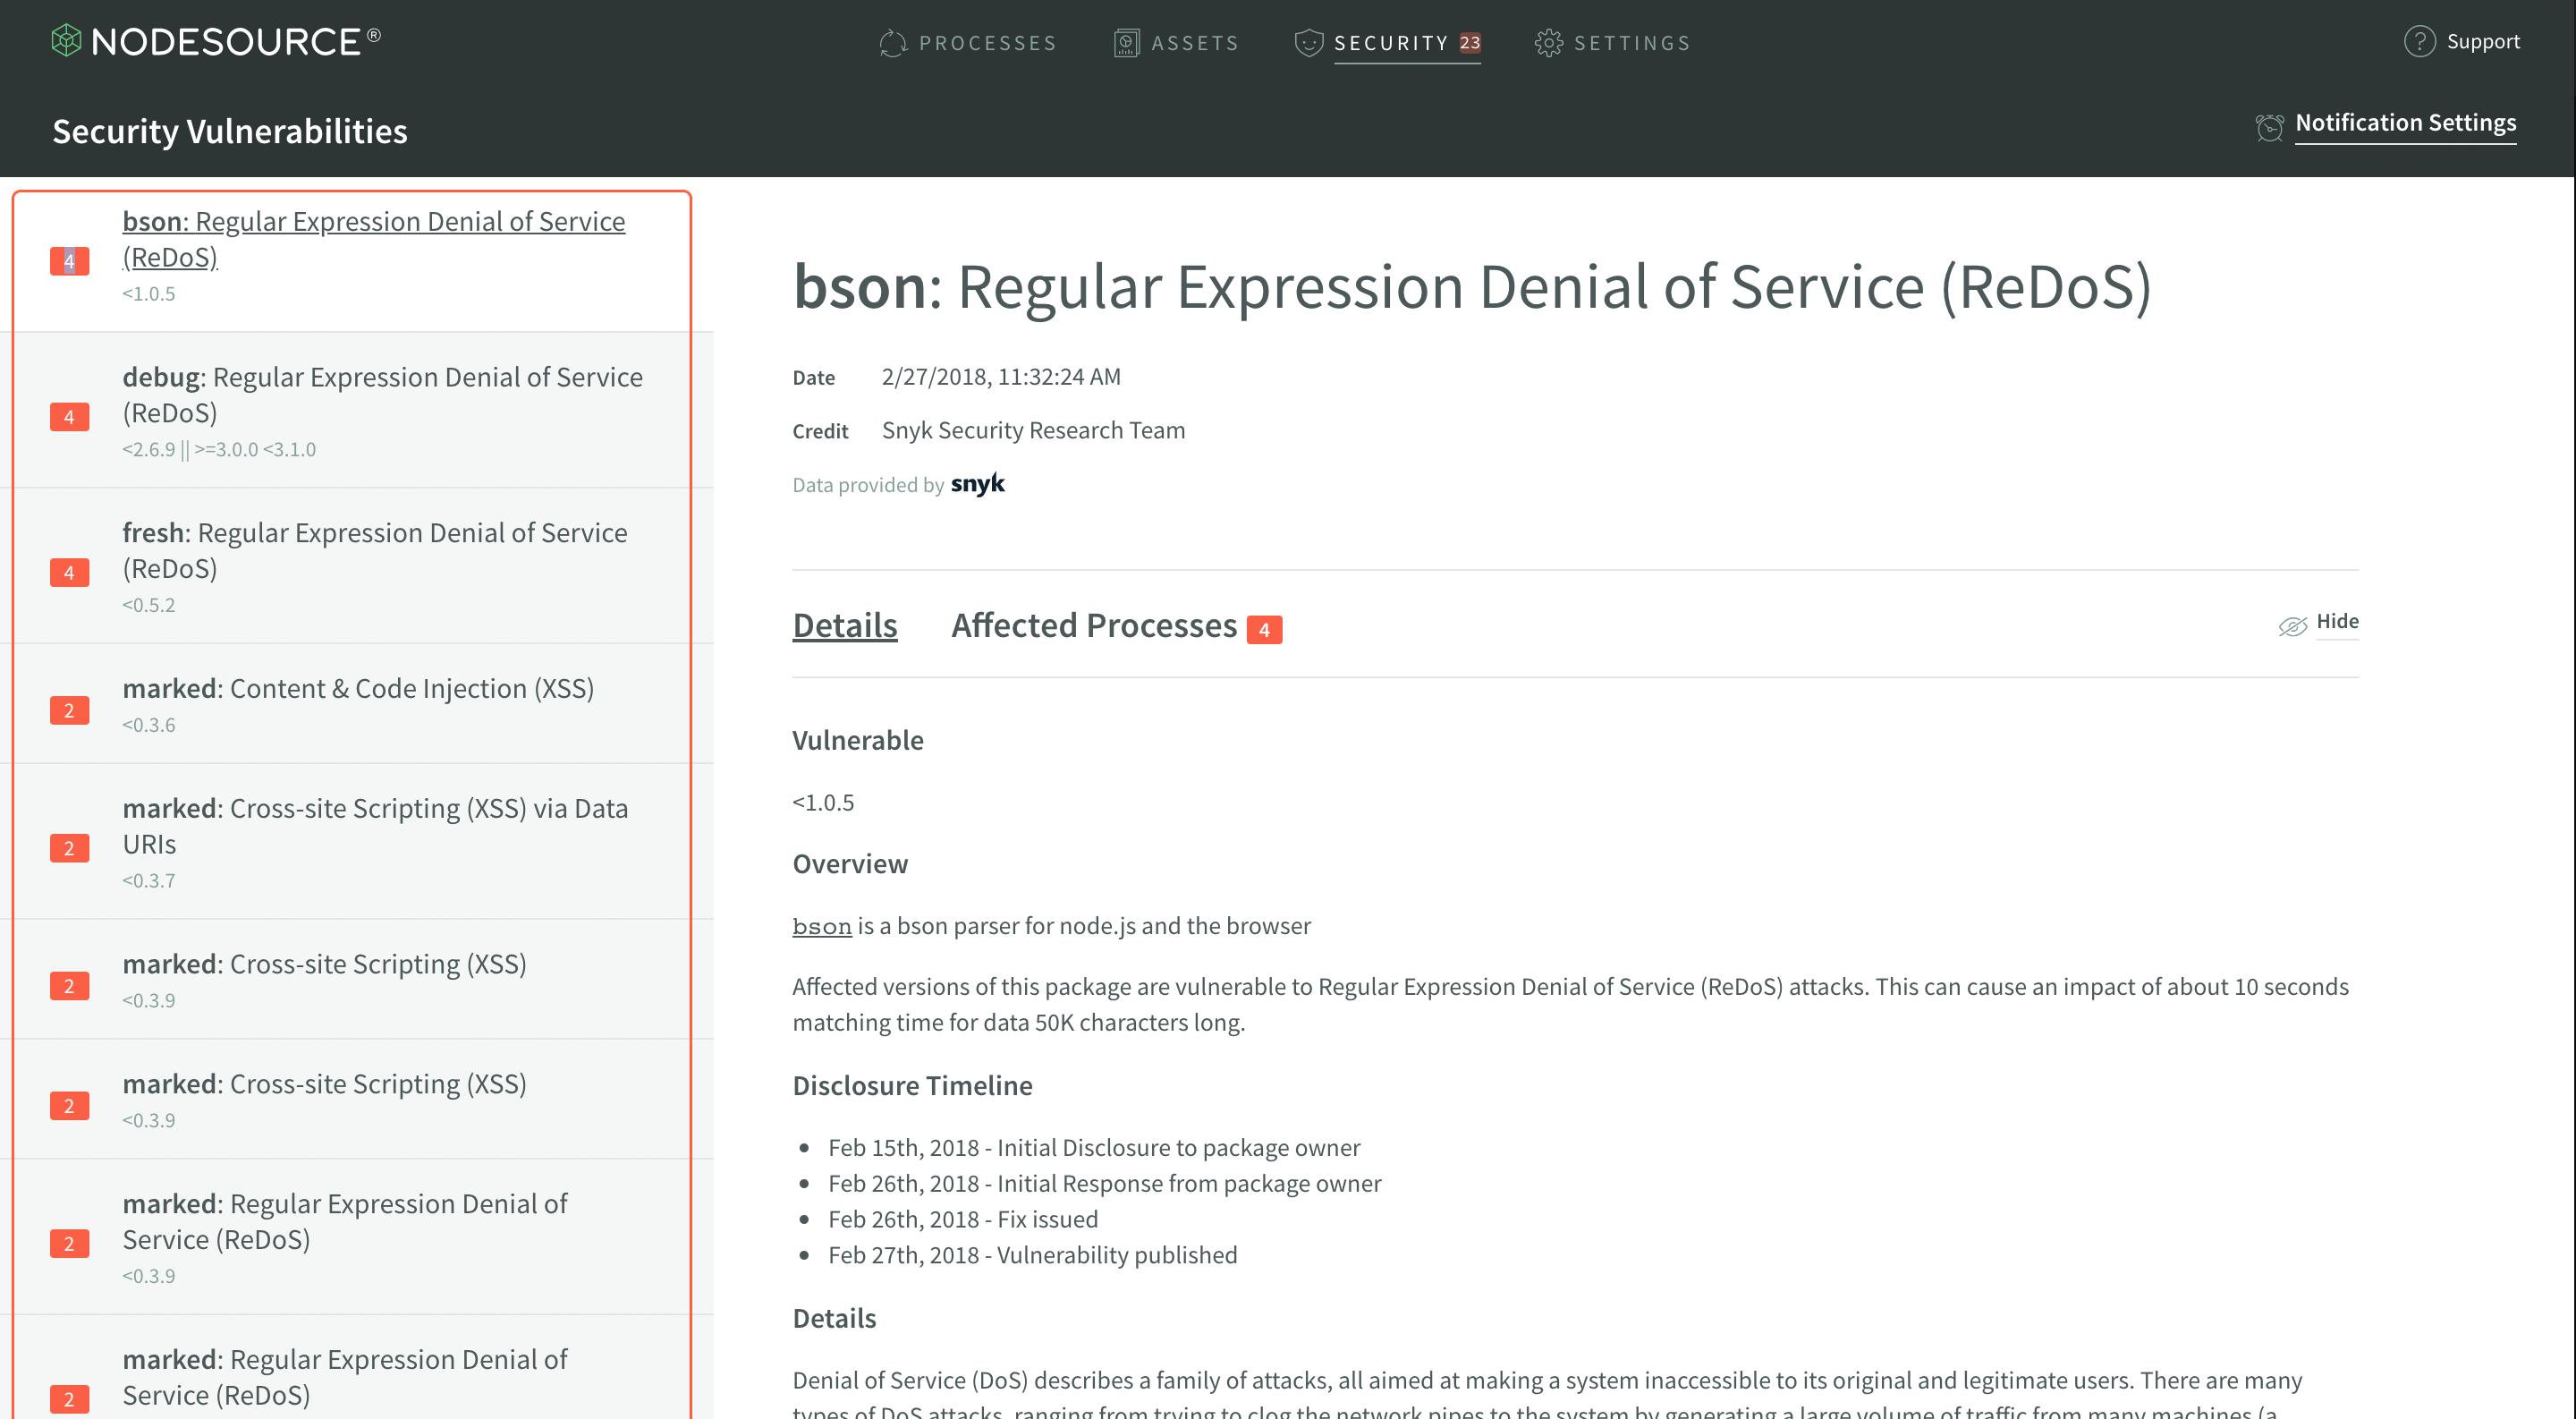
The first thing is to note in the sidebar is that each vulnerability marks how many processes are affected by it.
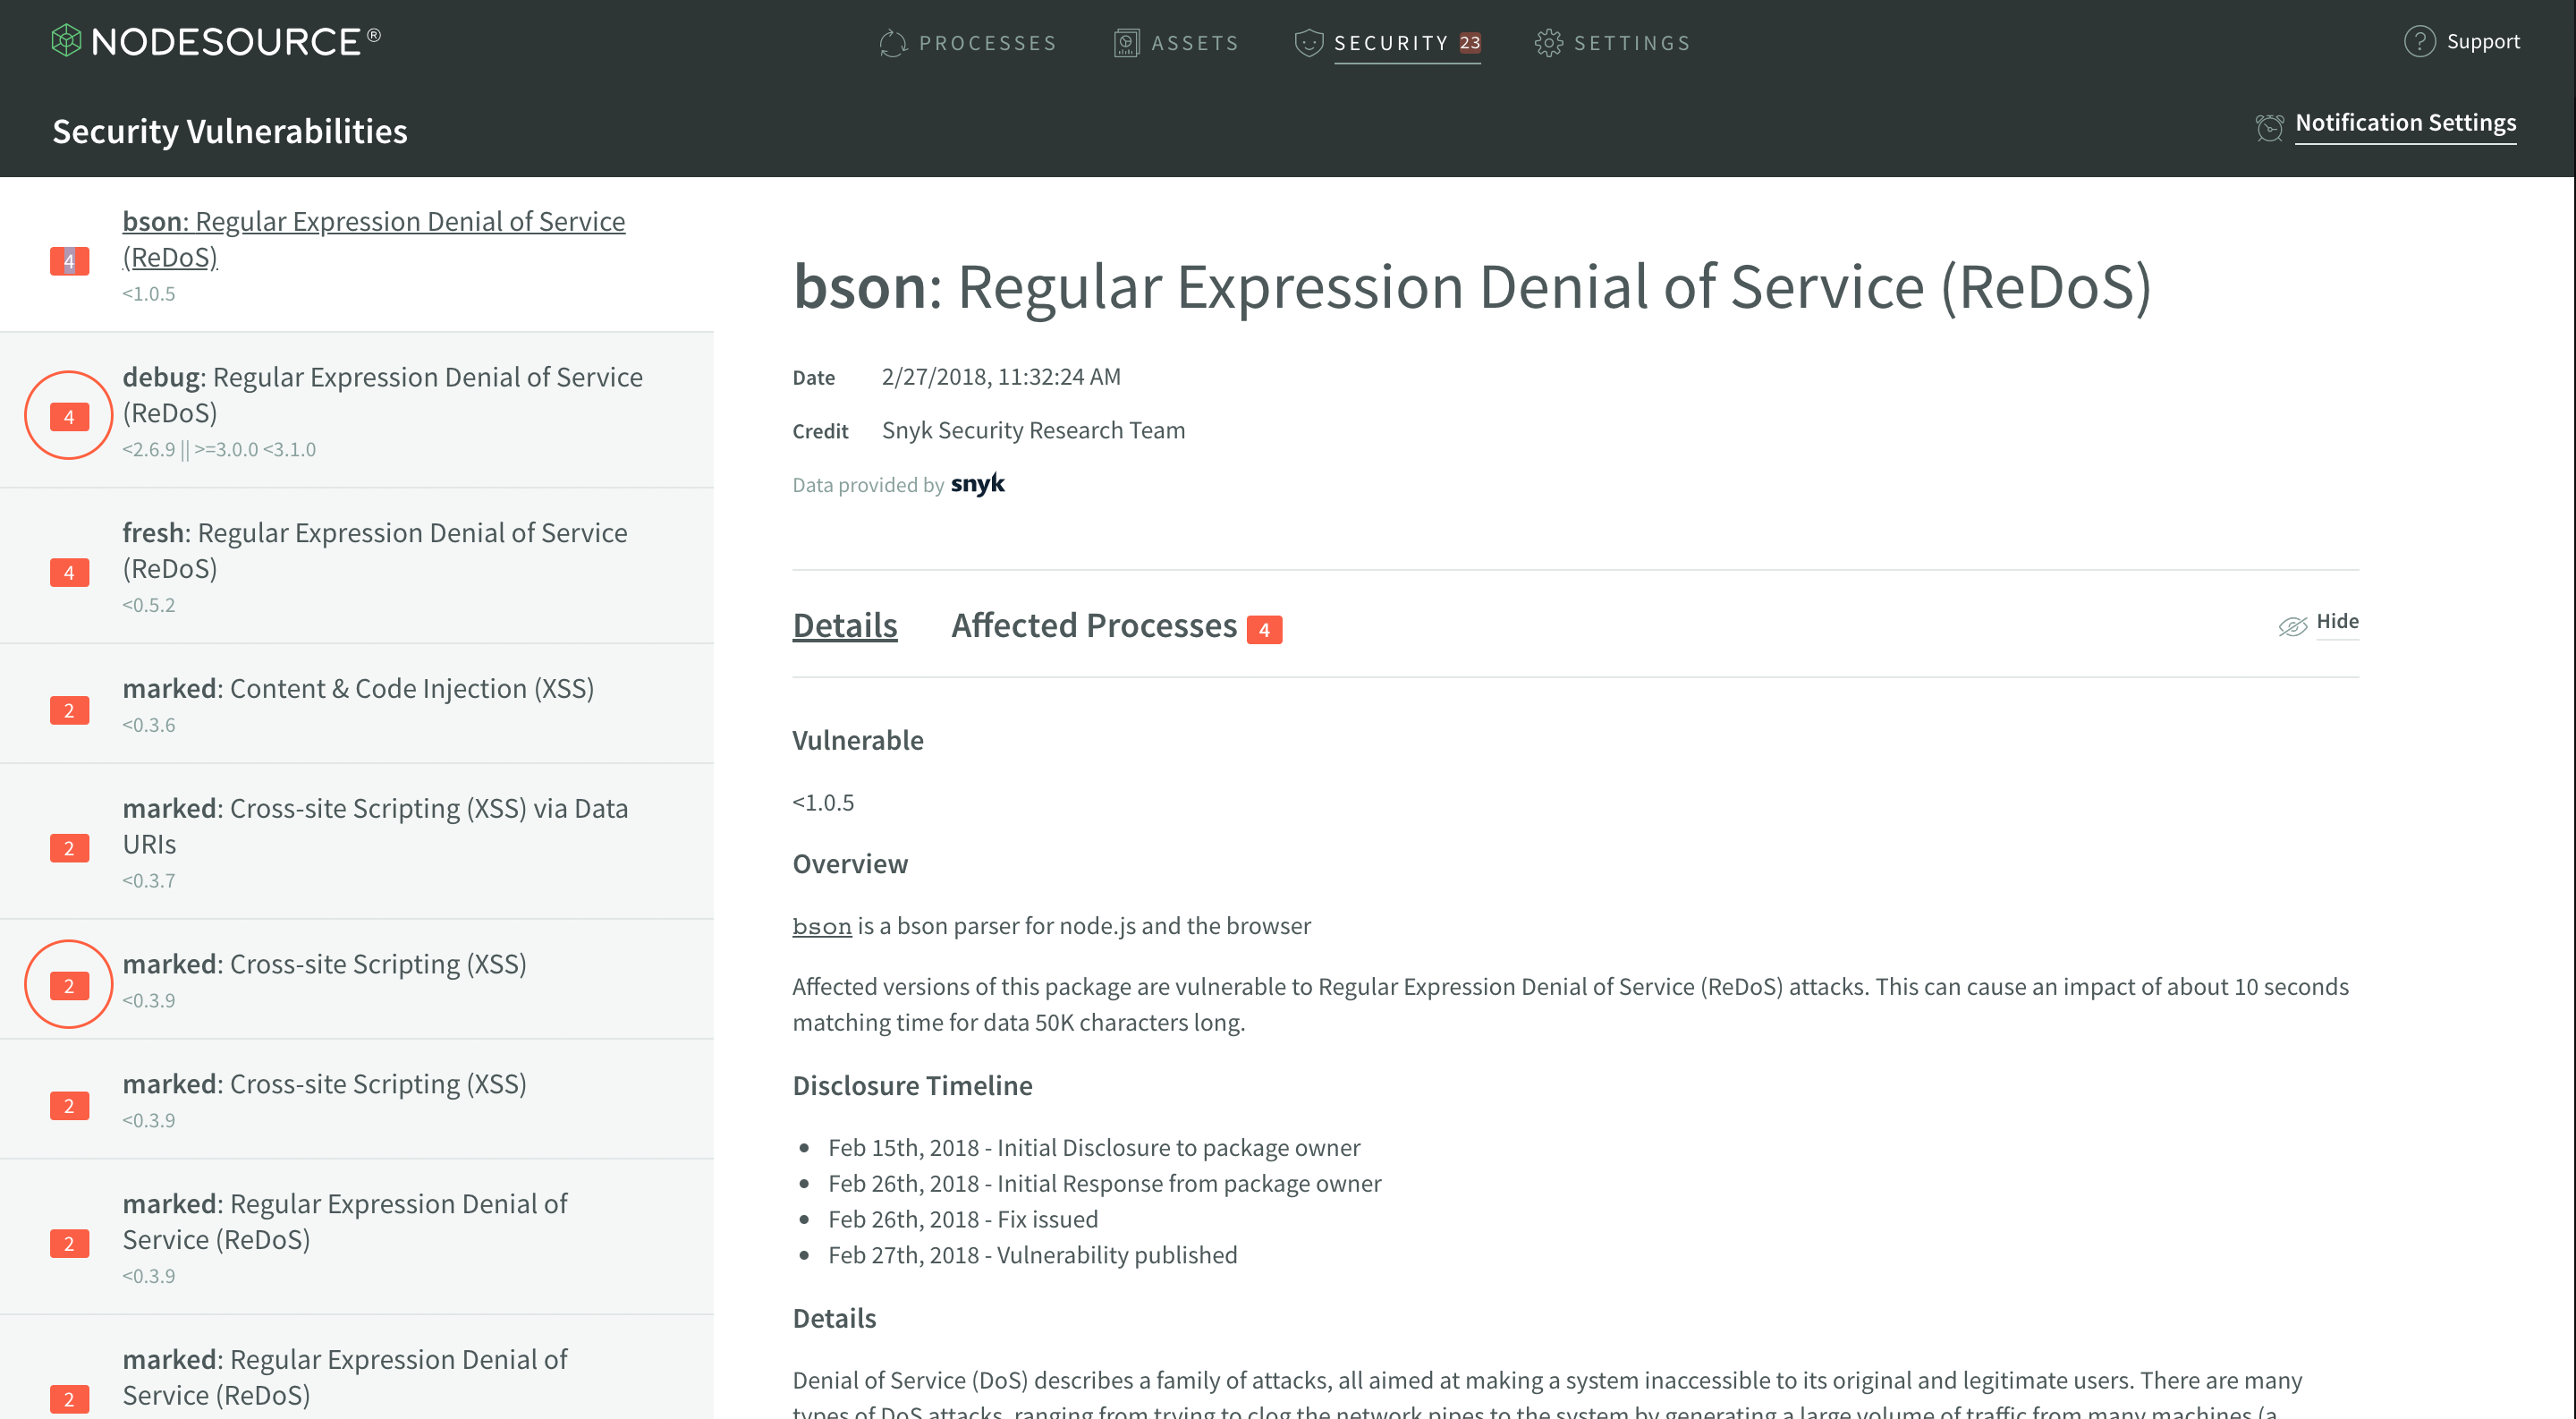
If you’re deploying dozens of microservices, this number will report on each application and help you identify and prioritize which modules need to be triaged in your production deployments.
The next thing to note is that each module has a listed version range the vulnerability affects. This expression can become a rather complex range if the vulnerability spans multiple semver major versions affected by the same vulnerability.
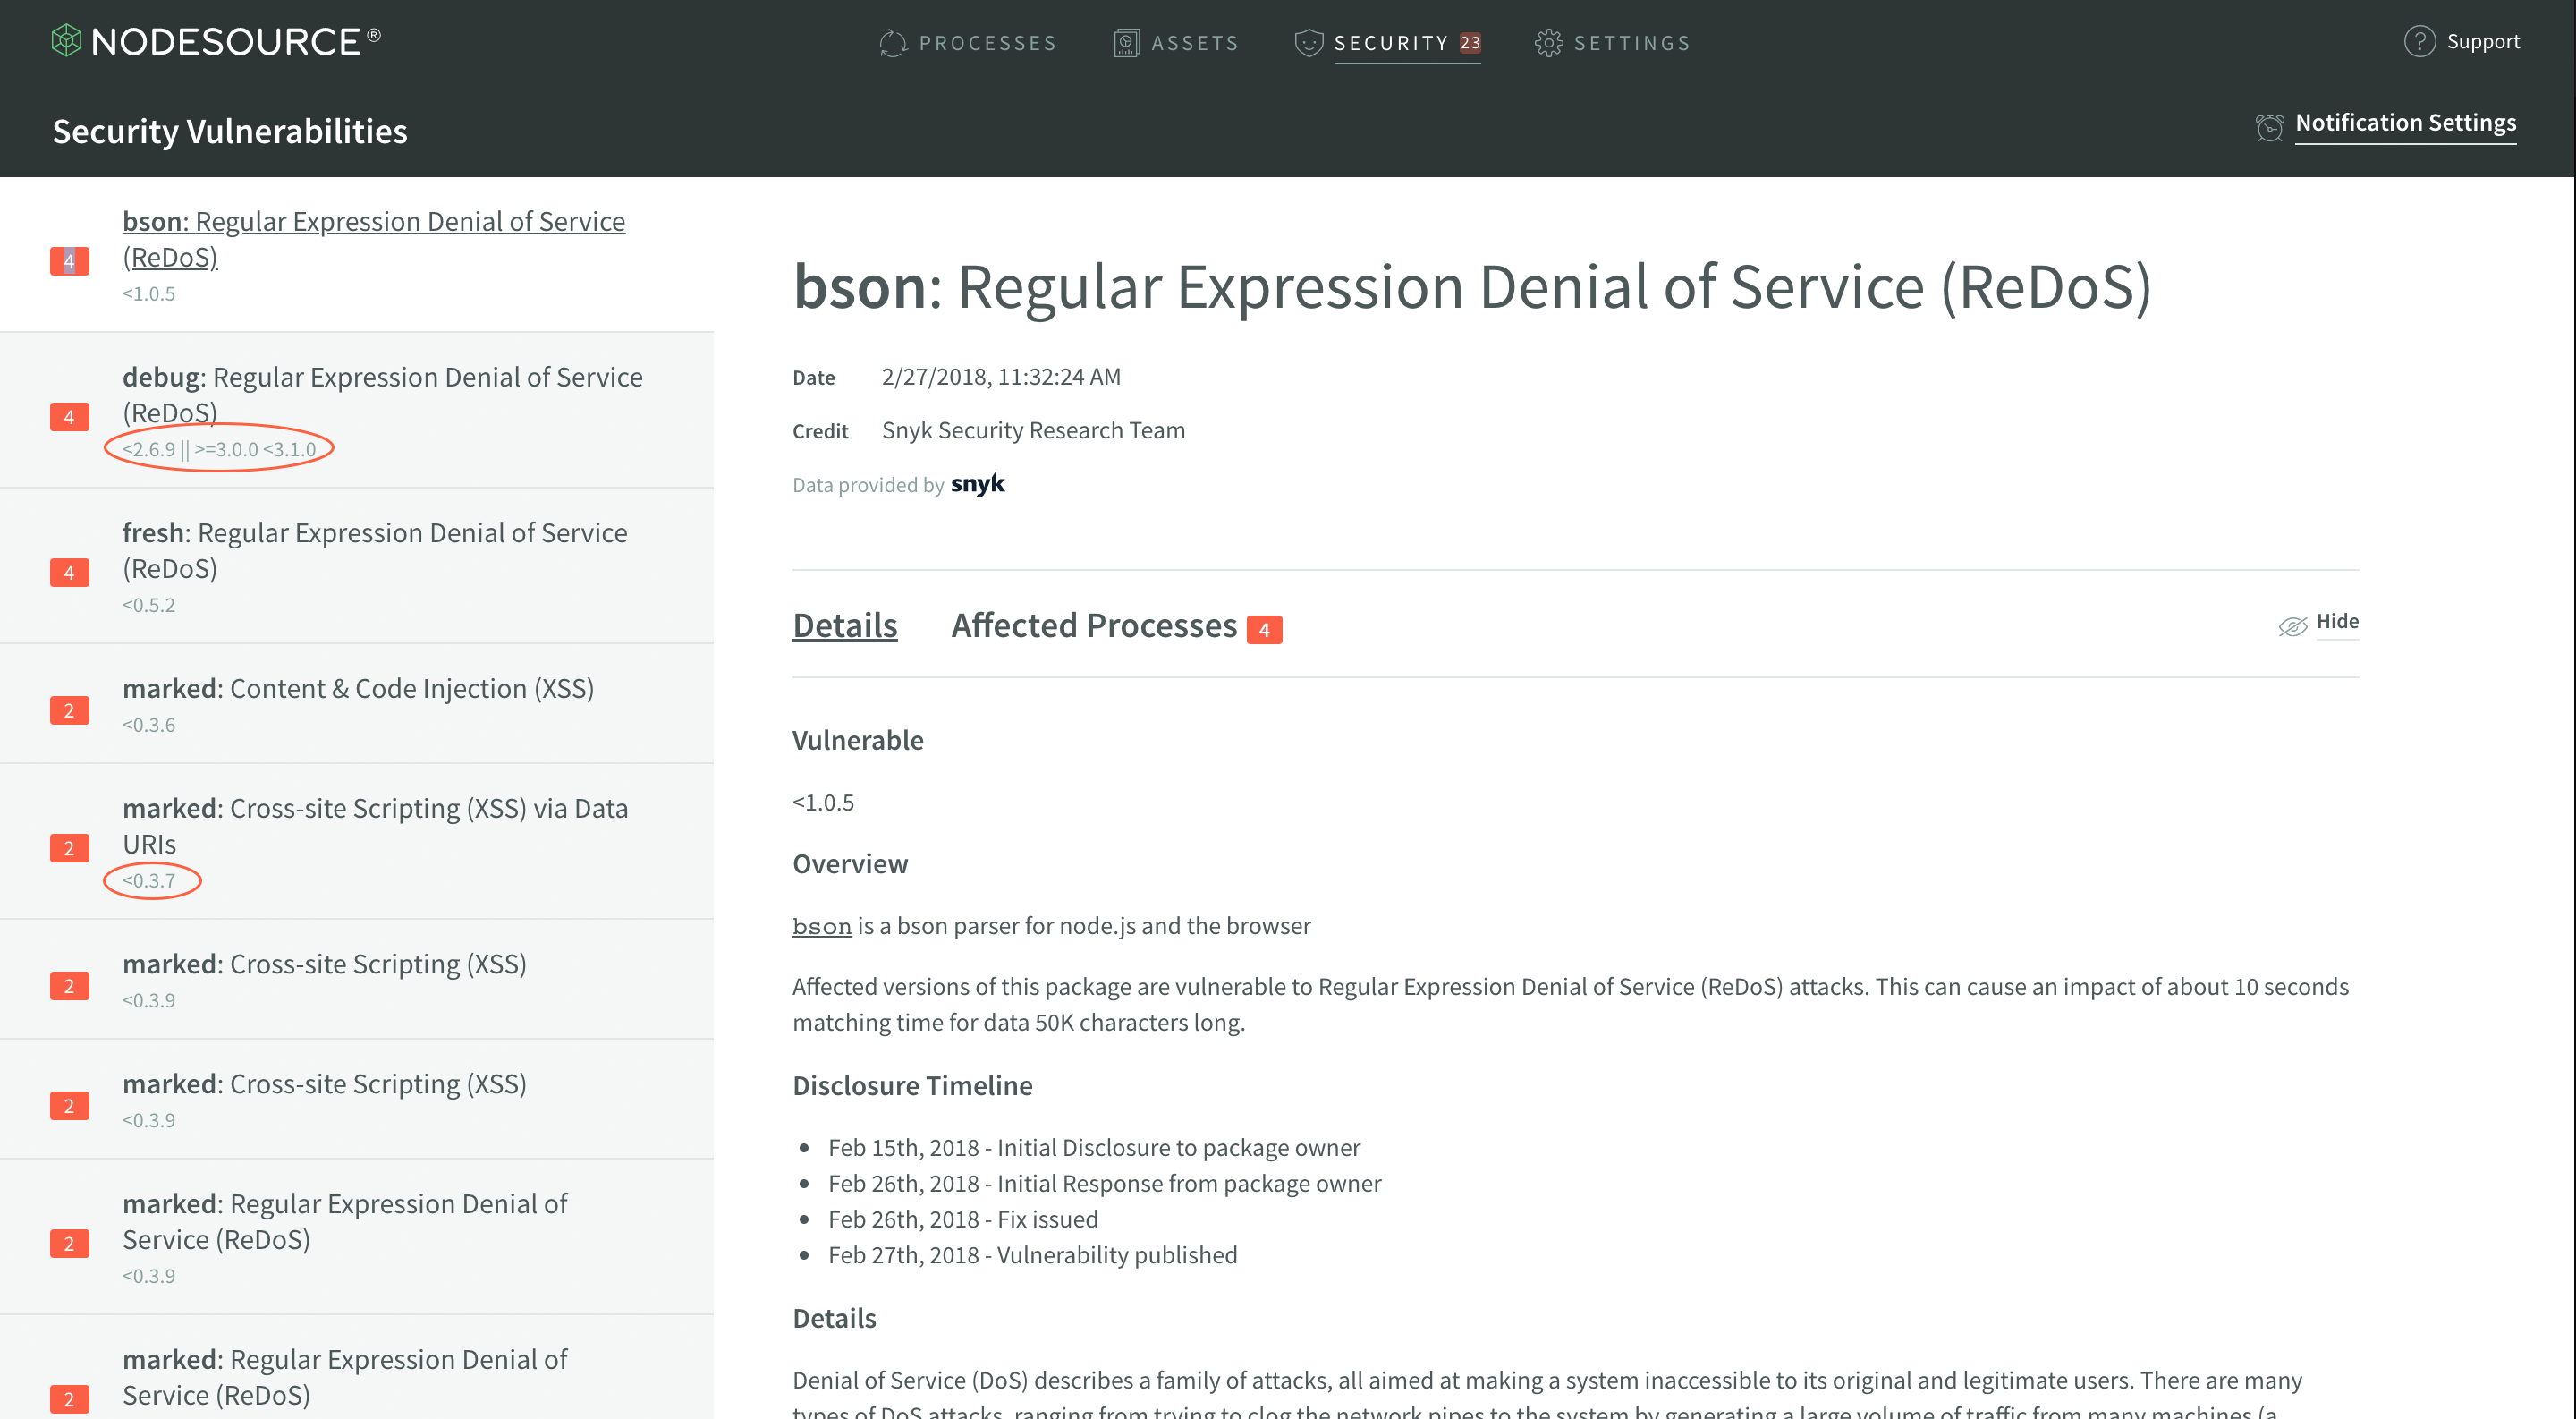
Finally, the final thing to note is that there will be one item for every known vulnerability. This means that even if there are only three modules with vulnerabilities, they could each have 5 or more known vulnerabilities and you’d end up with a detailed list of each of those vulnerabilities and the explicit information on that exact vulnerability.
This also means that there’s ample information on what kind of vulnerabilities you’re opening your Node.js applications to. XSS and RegEx DoS vulnerabilities are what are shown in the screenshot, but this will dynamically change to explicitly tell you exactly what kind of vulnerabilities are present and allow you to–again–prioritize and triage effectively.
Vulnerability Display
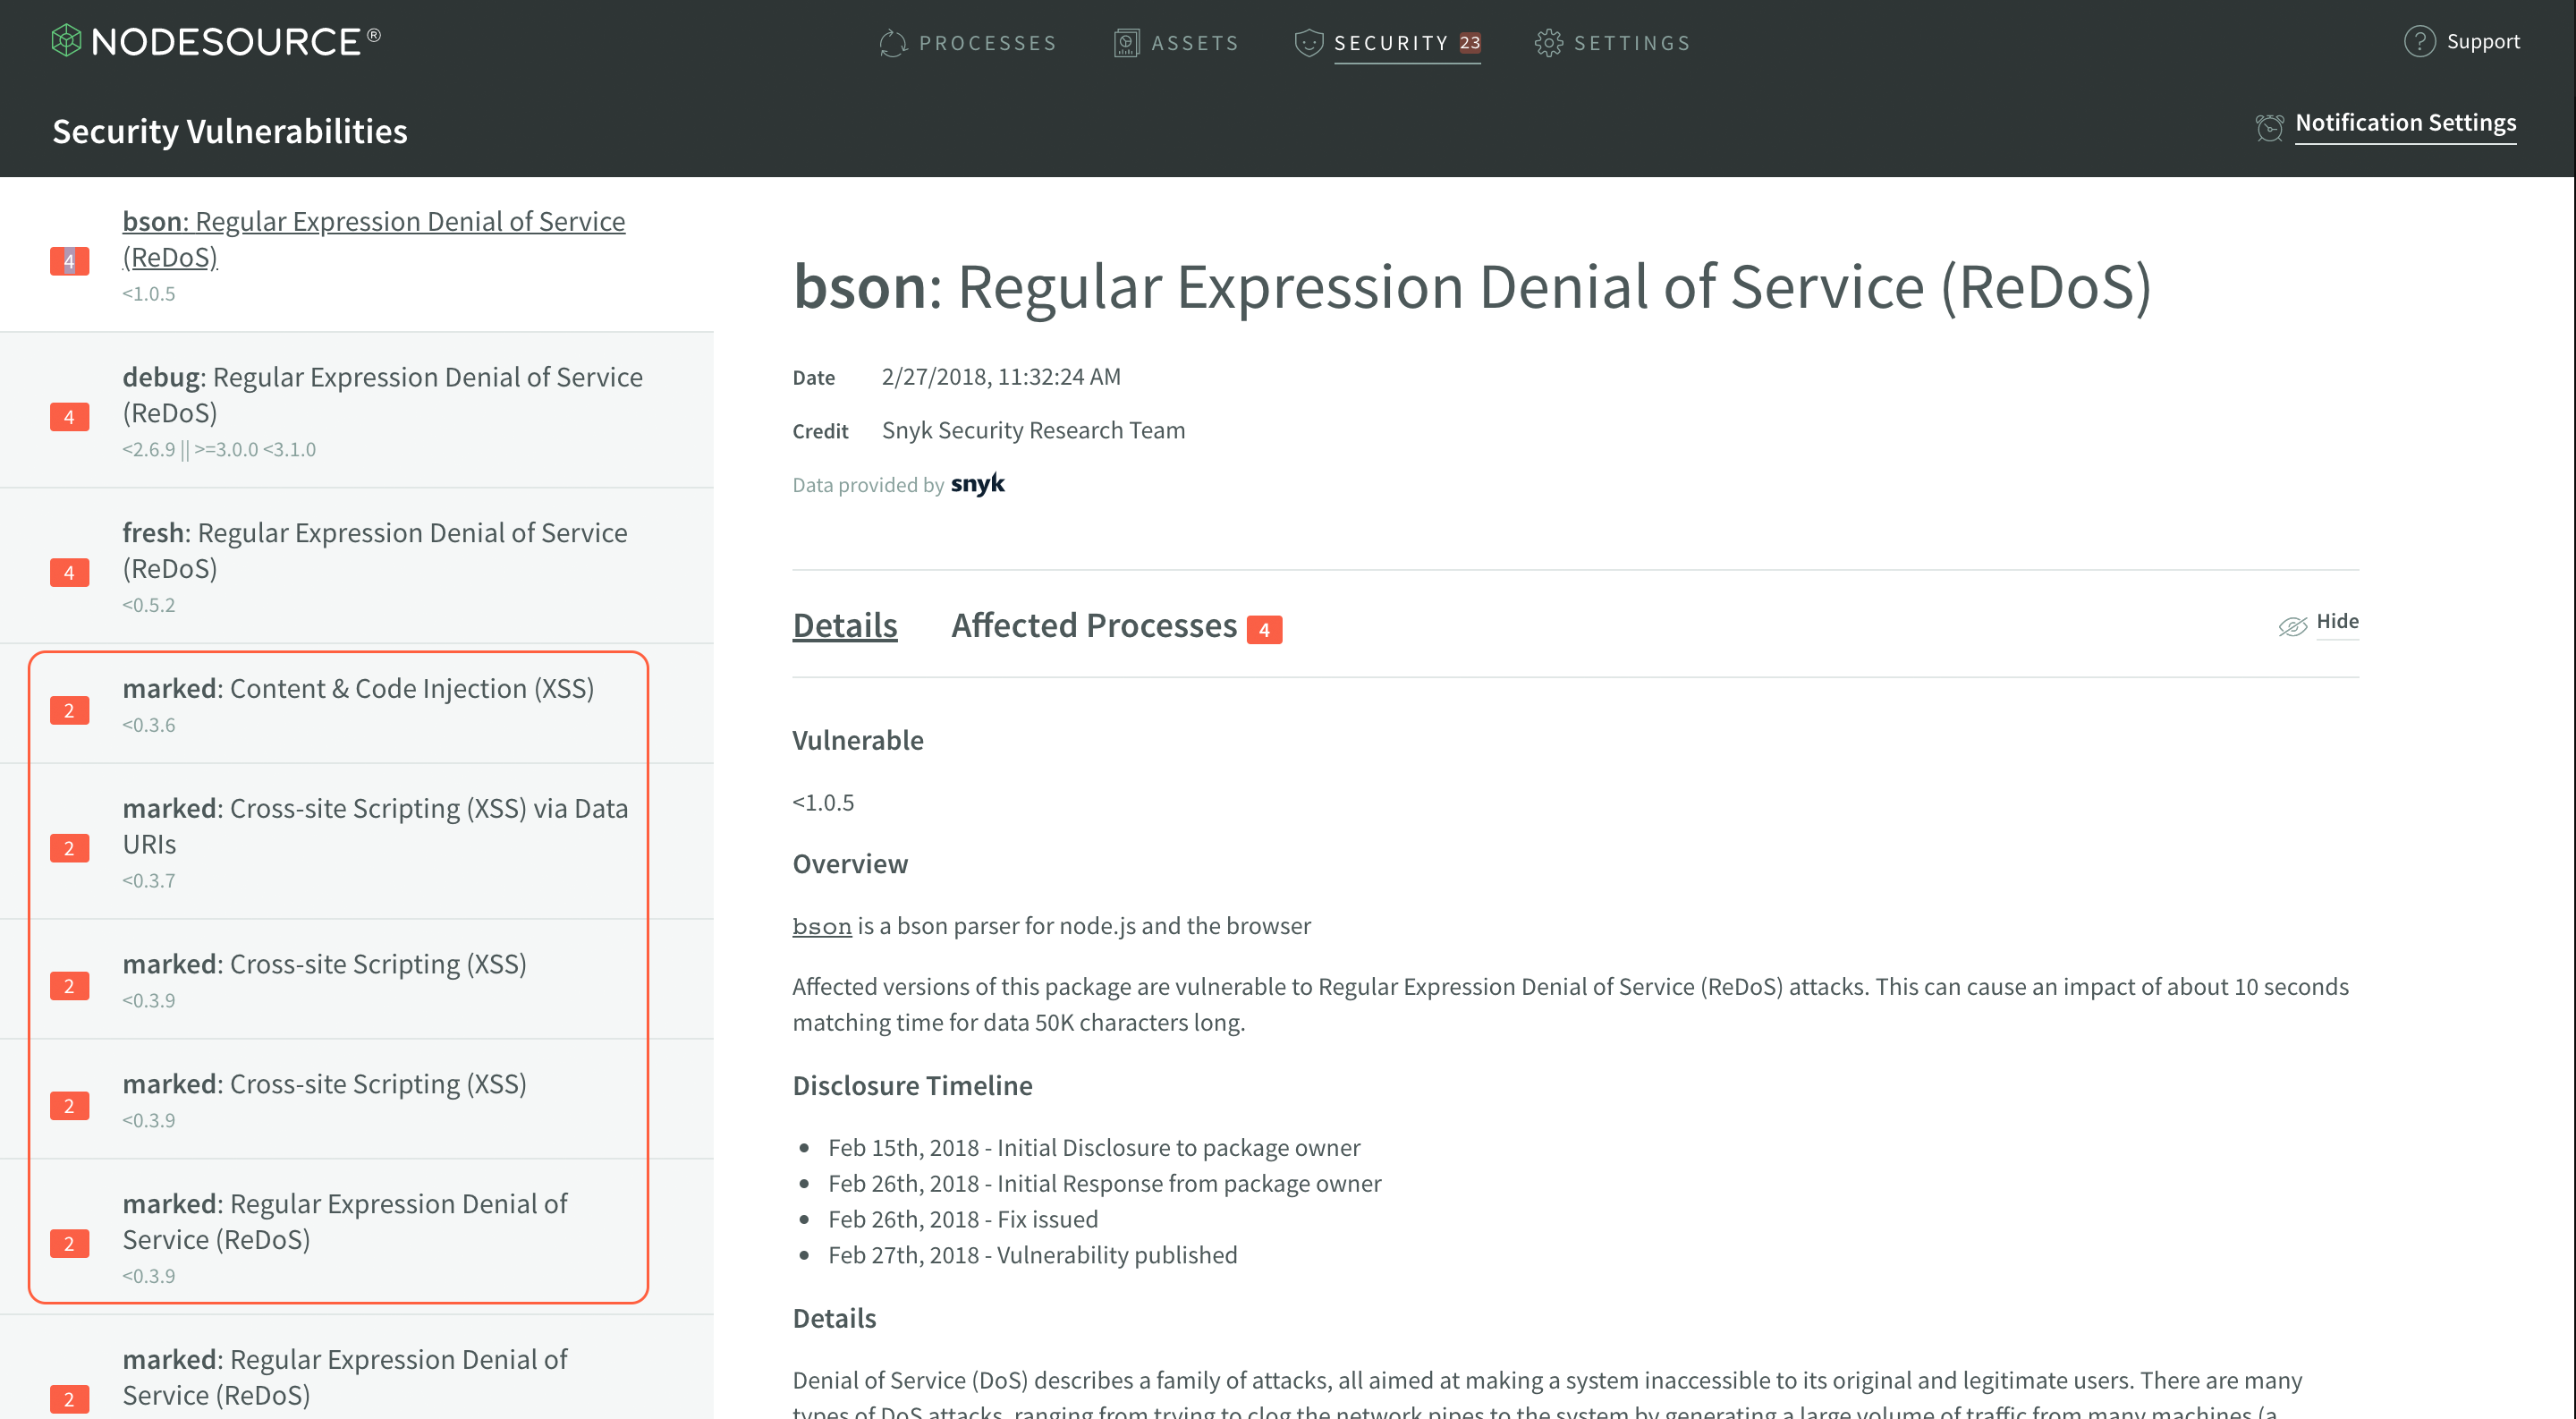
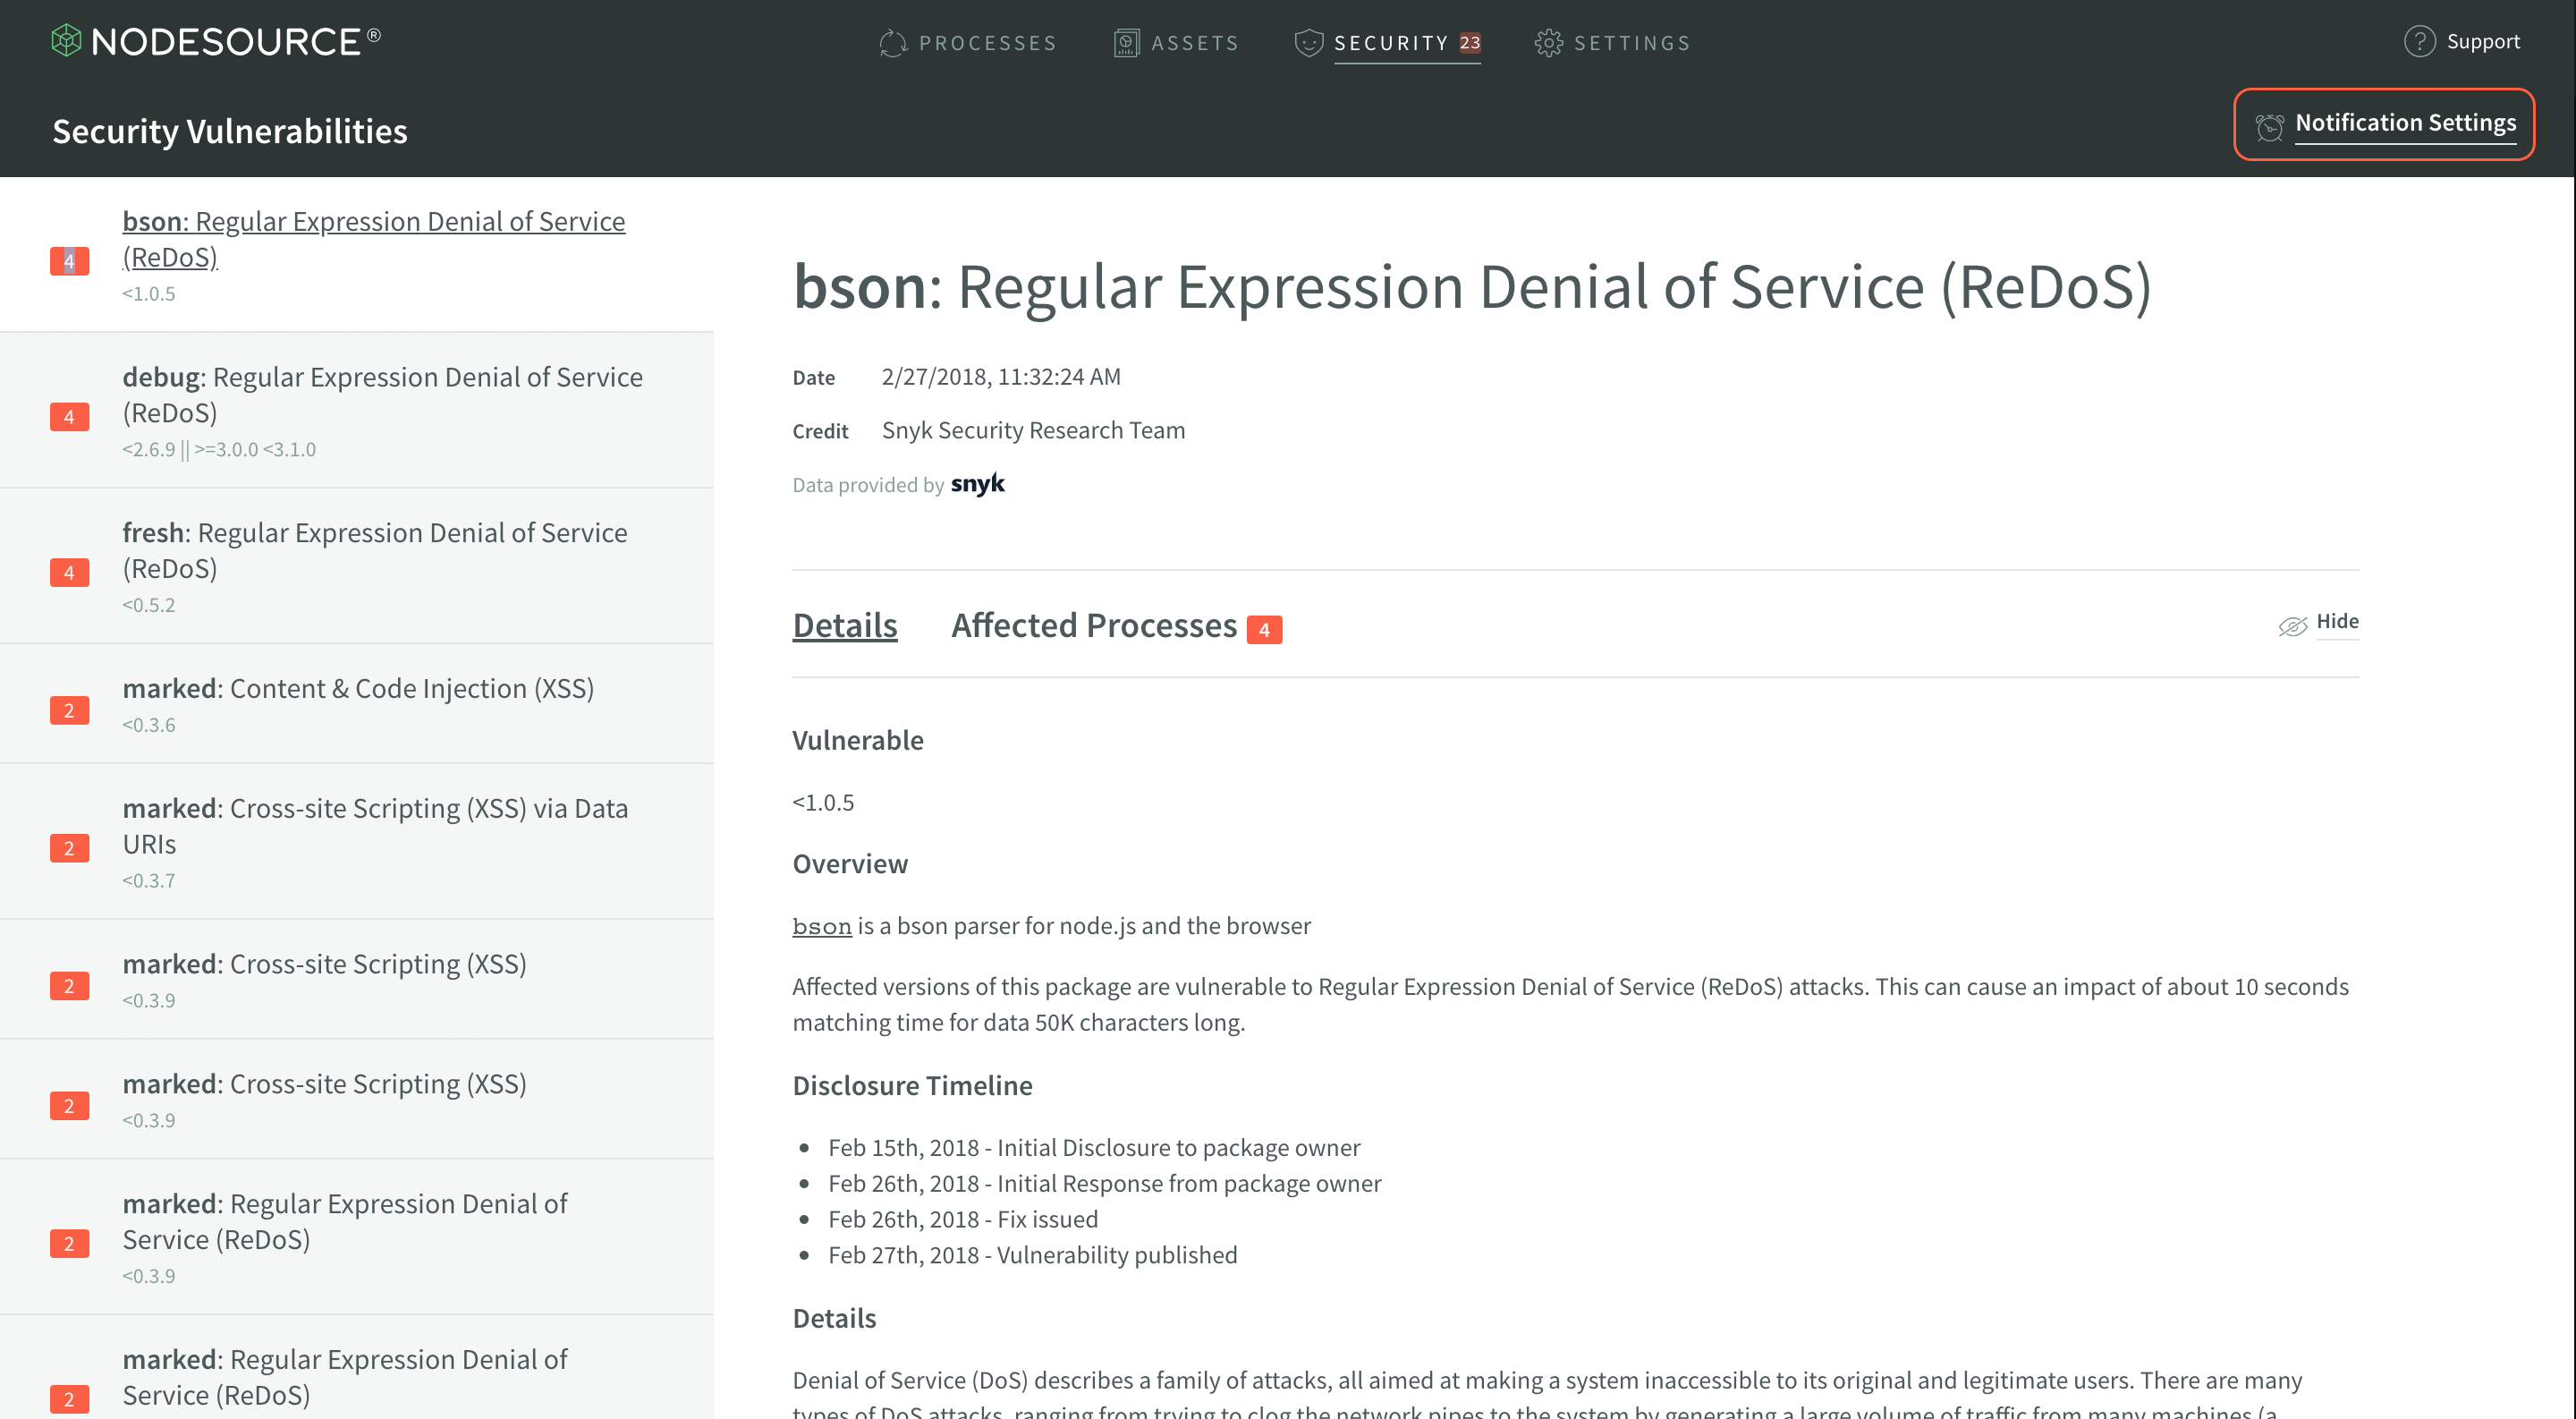
The vulnerability display shows quite a bit of information about the vulnerability selected in the vulnerability list. This information includes everything from the date the vulnerability was disclosed, to the exact details of the vulnerability.
The first section to note in the Vulnerability Display is the header, which shares some important meta information. The header includes the name of the module and the title of the vulnerability is present, the date the vulnerability was disclosed, and name of the individual or group which deserves credit for disclosing the vulnerability.

This info can often be extremely helpful in figuring out how severe the vulnerability is, how recently the vulnerability was disclosed, and how much the vulnerability may affect your applications.
Next is the vulnerability details display. The structure of this may change from vulnerability to vulnerability, as it is the information reported by the source of the vulnerability information.
This information will often include details about how the vulnerability could affect a developer, in addition to some information about how the vulnerability specifically applies to the module that it was discovered in.
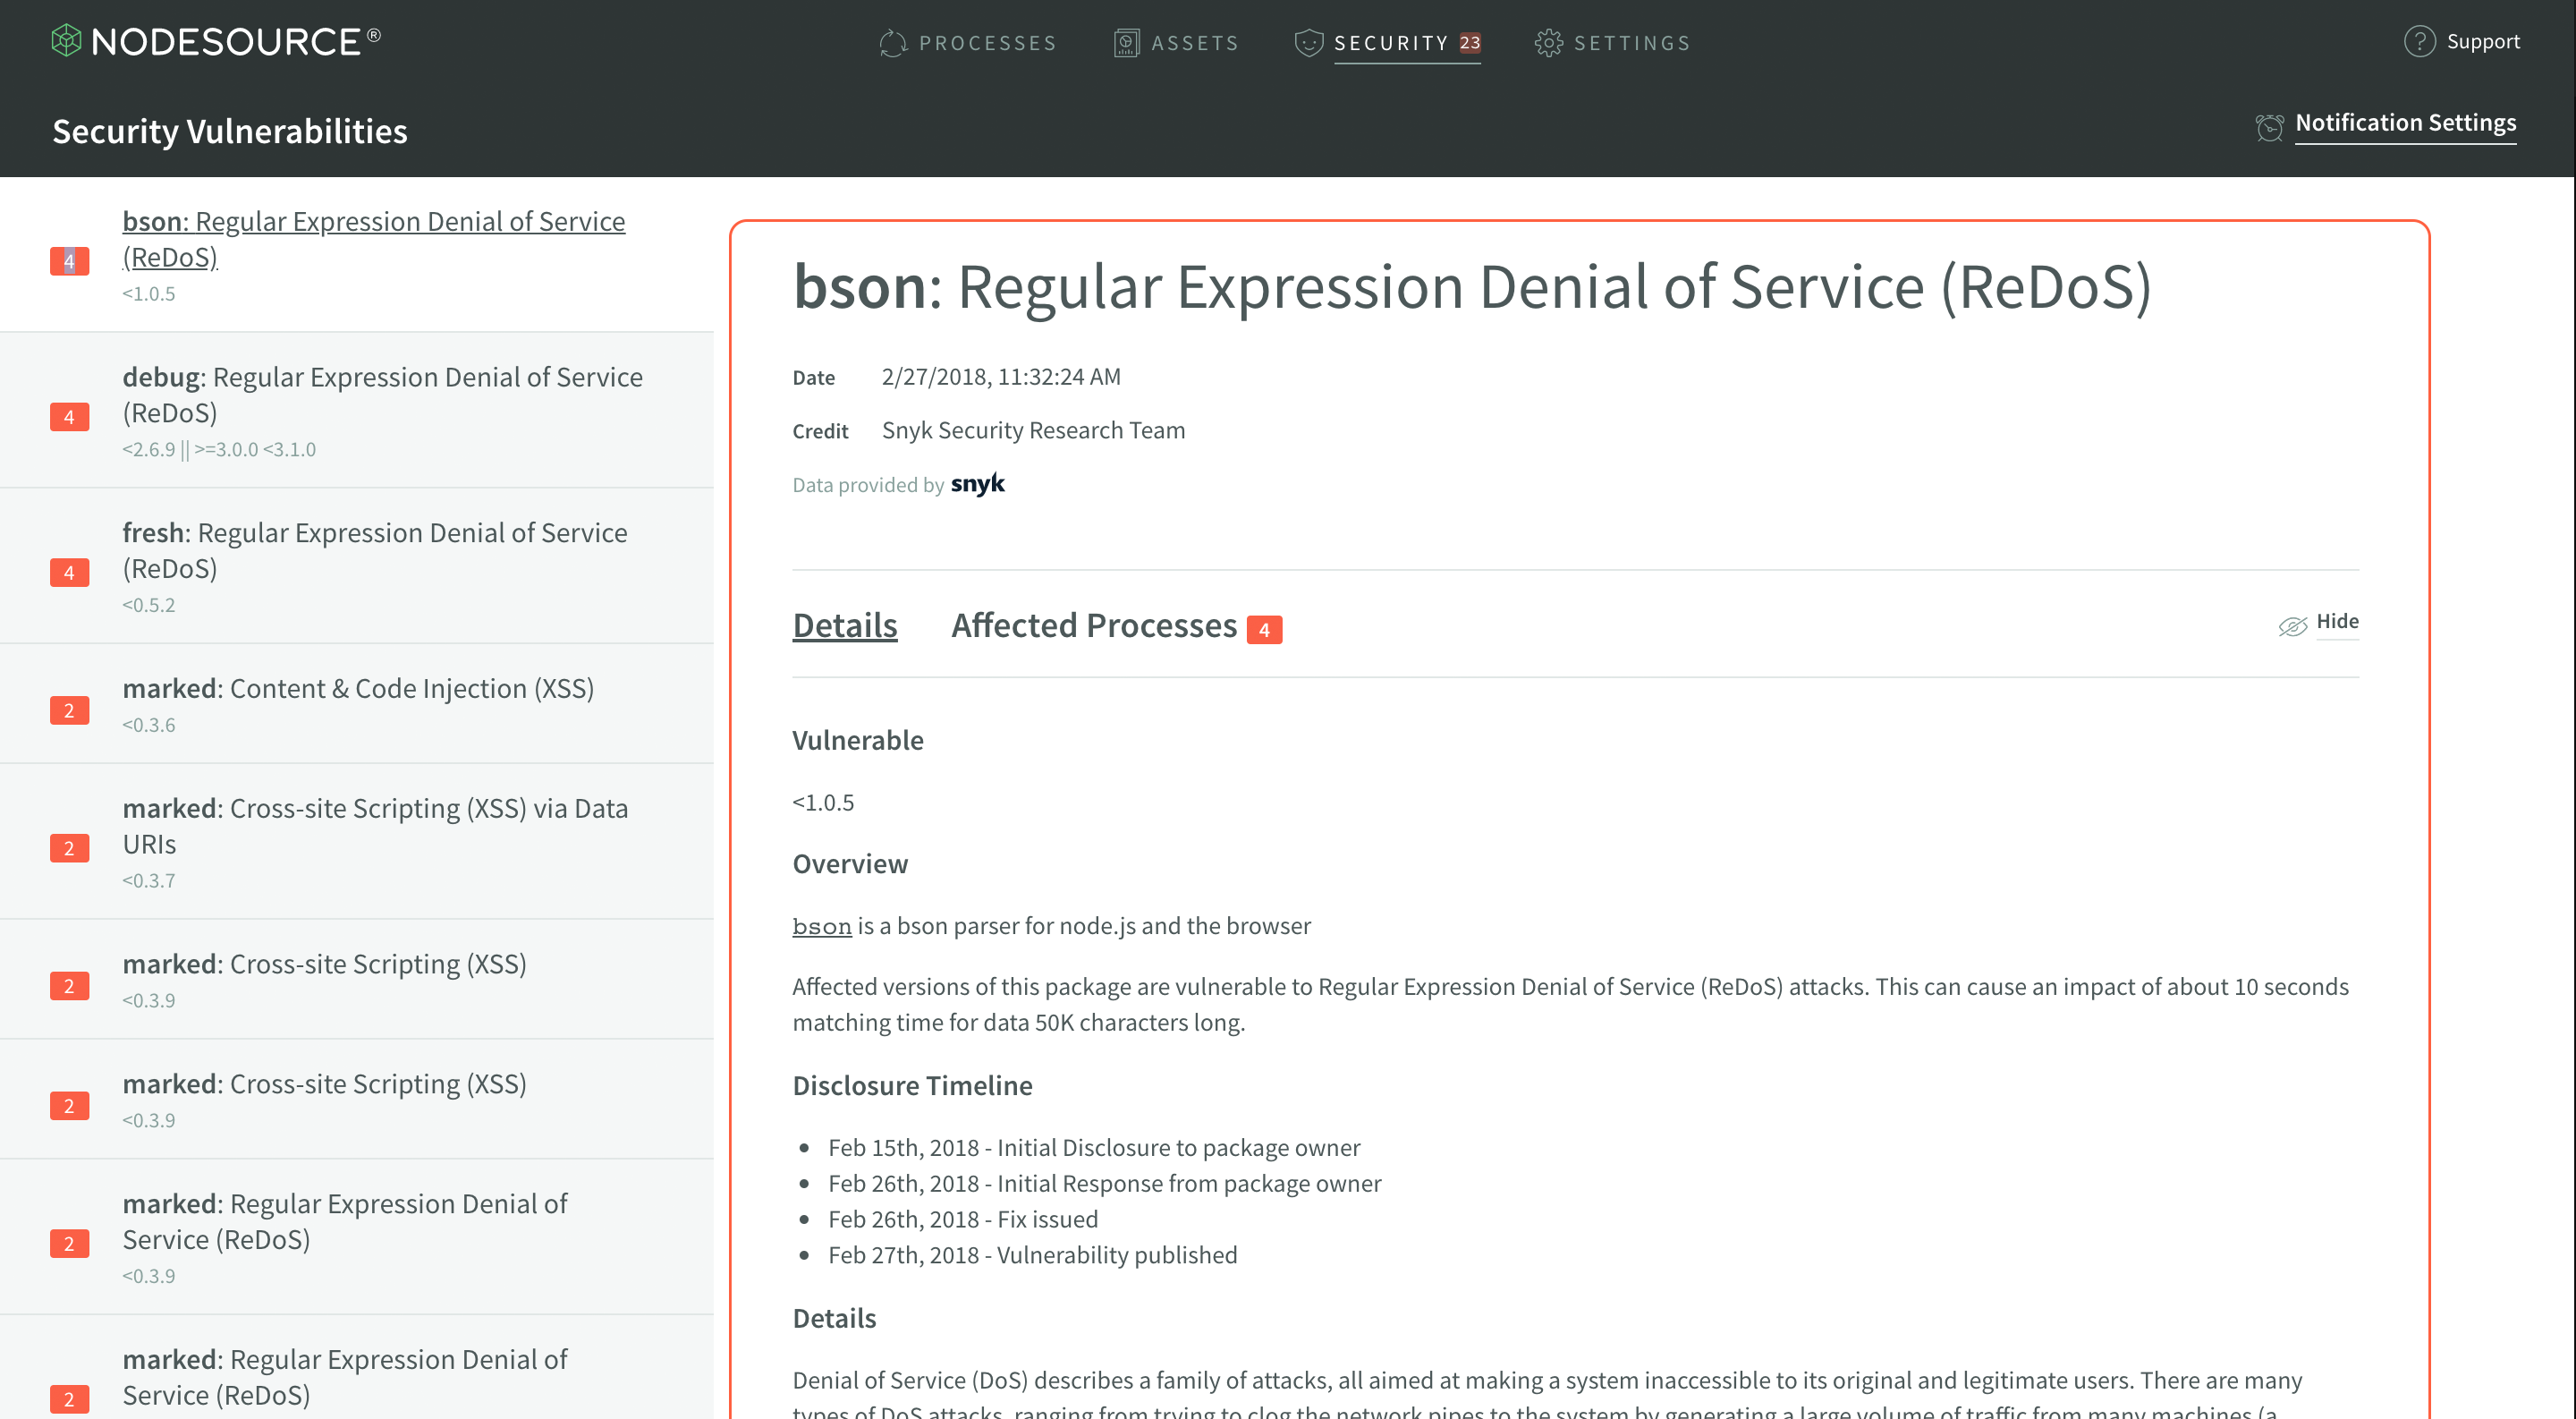
There are actually two tabs in the vulnerability display section - one shows the details, and the other–Affected Processes–actually shows you which of your currently running Node.js processes are affected by any given vulnerability.
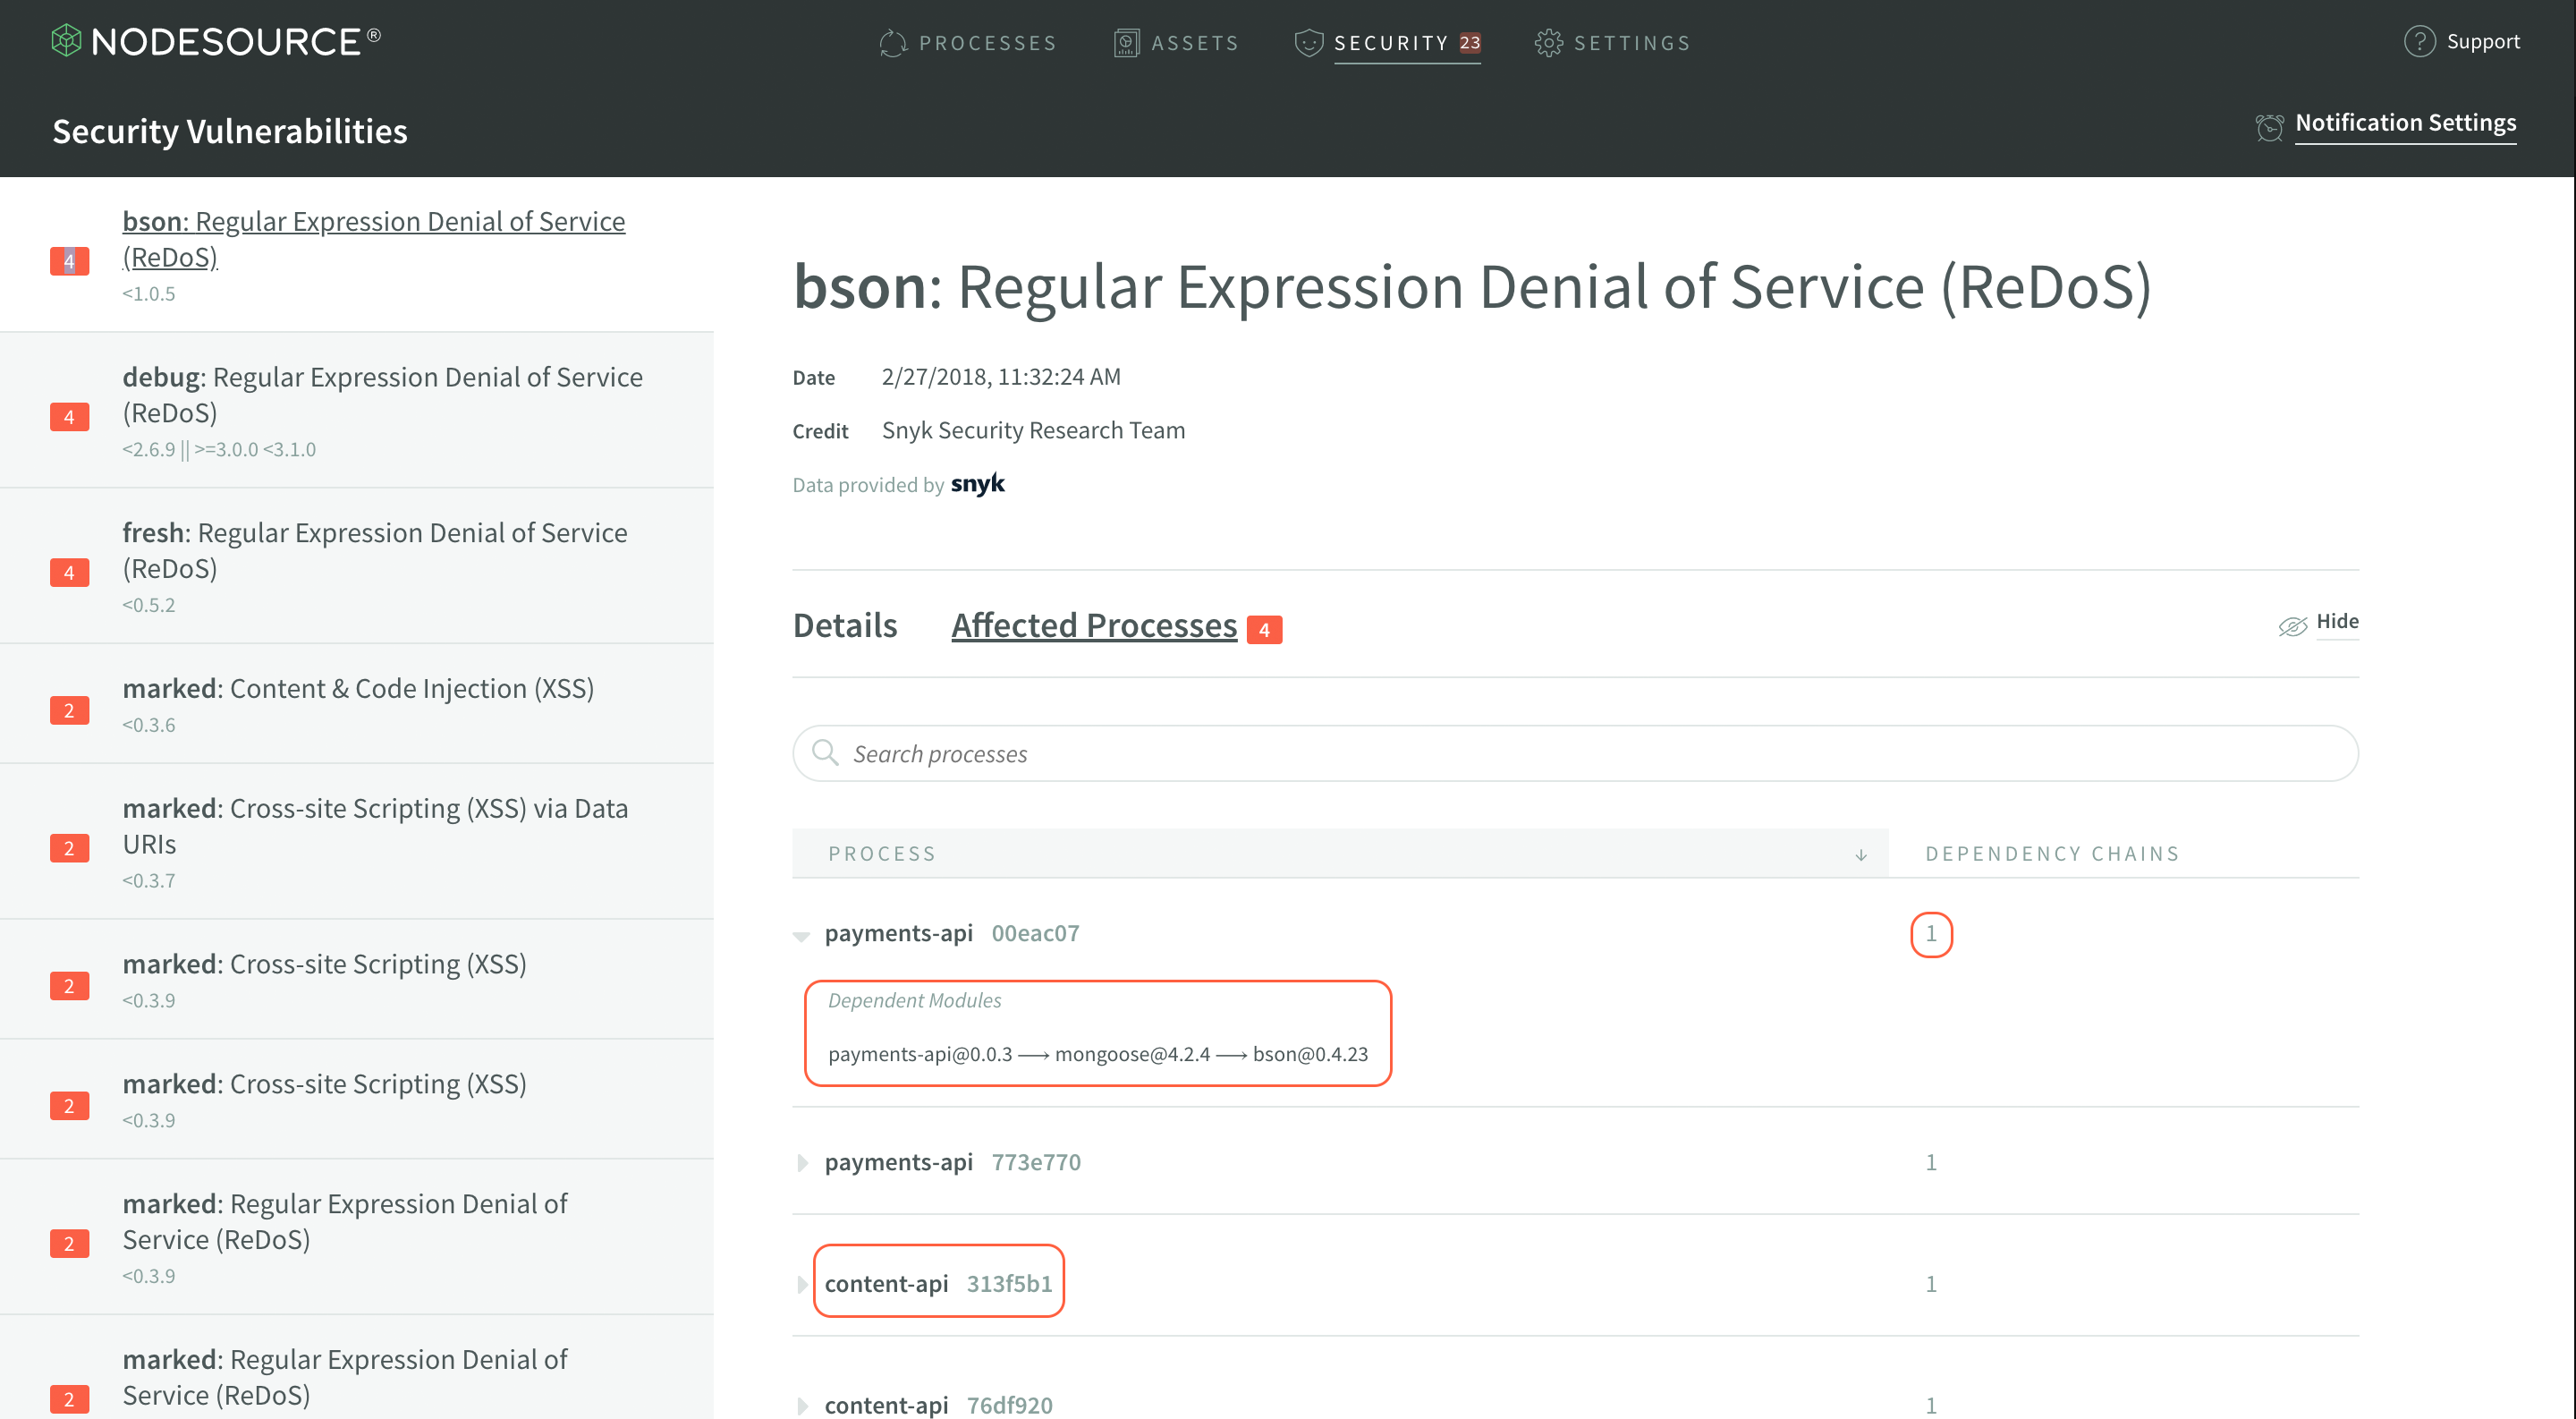
You’ll note three highlighted sections in the screenshot.
The largest highlighted area is where you will find the description of where the affected module lives in your application’s dependency tree. In the highlighted example, you can see that bson@0.4.23 is a direct dependency of mongoose@4.2.4. This tree can show you where the vulnerable module lives within your application.
The medium highlighted area at the bottom is yet another process that’s affected by the same vulnerability, and will show exactly how it’s affected, once expanded. Each process in the list can be expanded and examined accordingly.
The smallest highlighted area, to the right of the largest one, will notify you of how many times a module is depended upon in your dependency tree. So, in the case shown, there’s just one nested instance. However, take a look at this example:
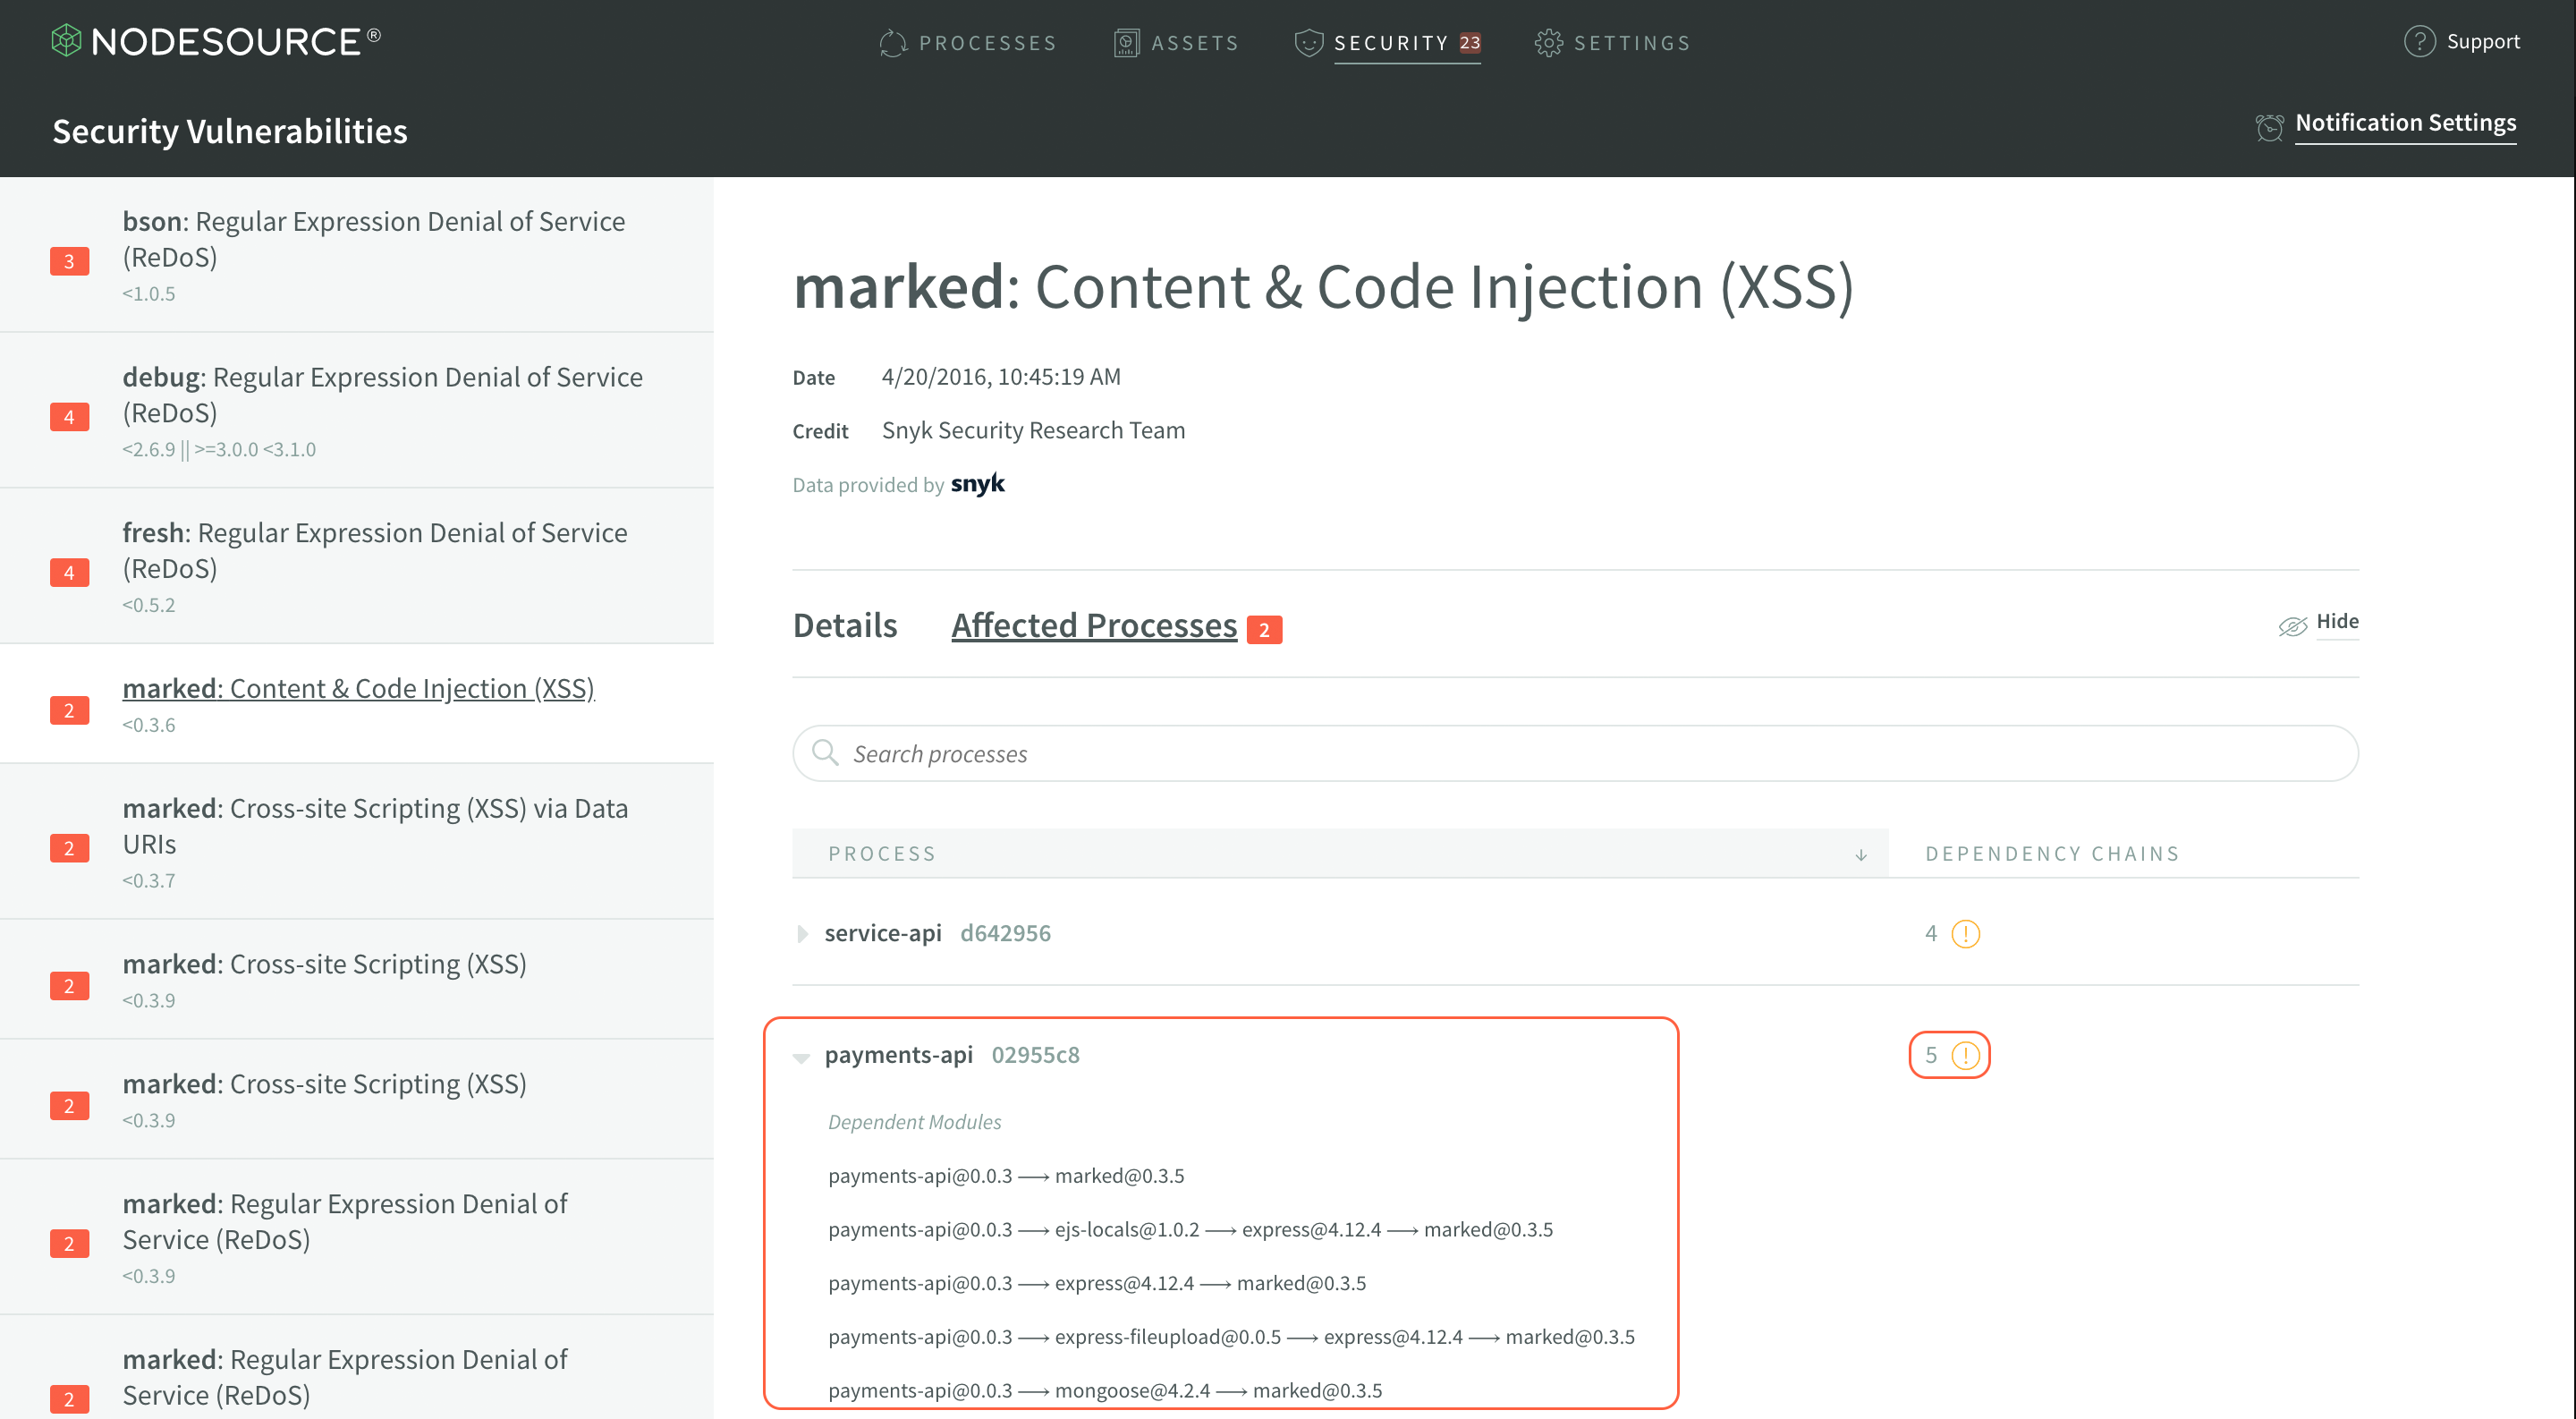
You can see that there’s 5 different dependency chains that include the vulnerability in marked@0.3.6 within the application’s dependency tree, including the top-level application itself. Also note one difference between this image and the last, in the smaller highlighted area - the red exclamation icon indicates in the process list that the application depends on directly. This icon can help identify which vulnerabilities are from using insecure modules directly versus as a dependency, and can help you prioritize vulnerabilities that you can fix most easily.
Vulnerability Notifications
Instead of needing to check in on your N|Solid Console every so often to see if there are any new vulnerabilities in your production services–which is a surefire way to find out too late–you can set up notifications to ping you as soon as a new vulnerability is detected so you can fix it ASAP.
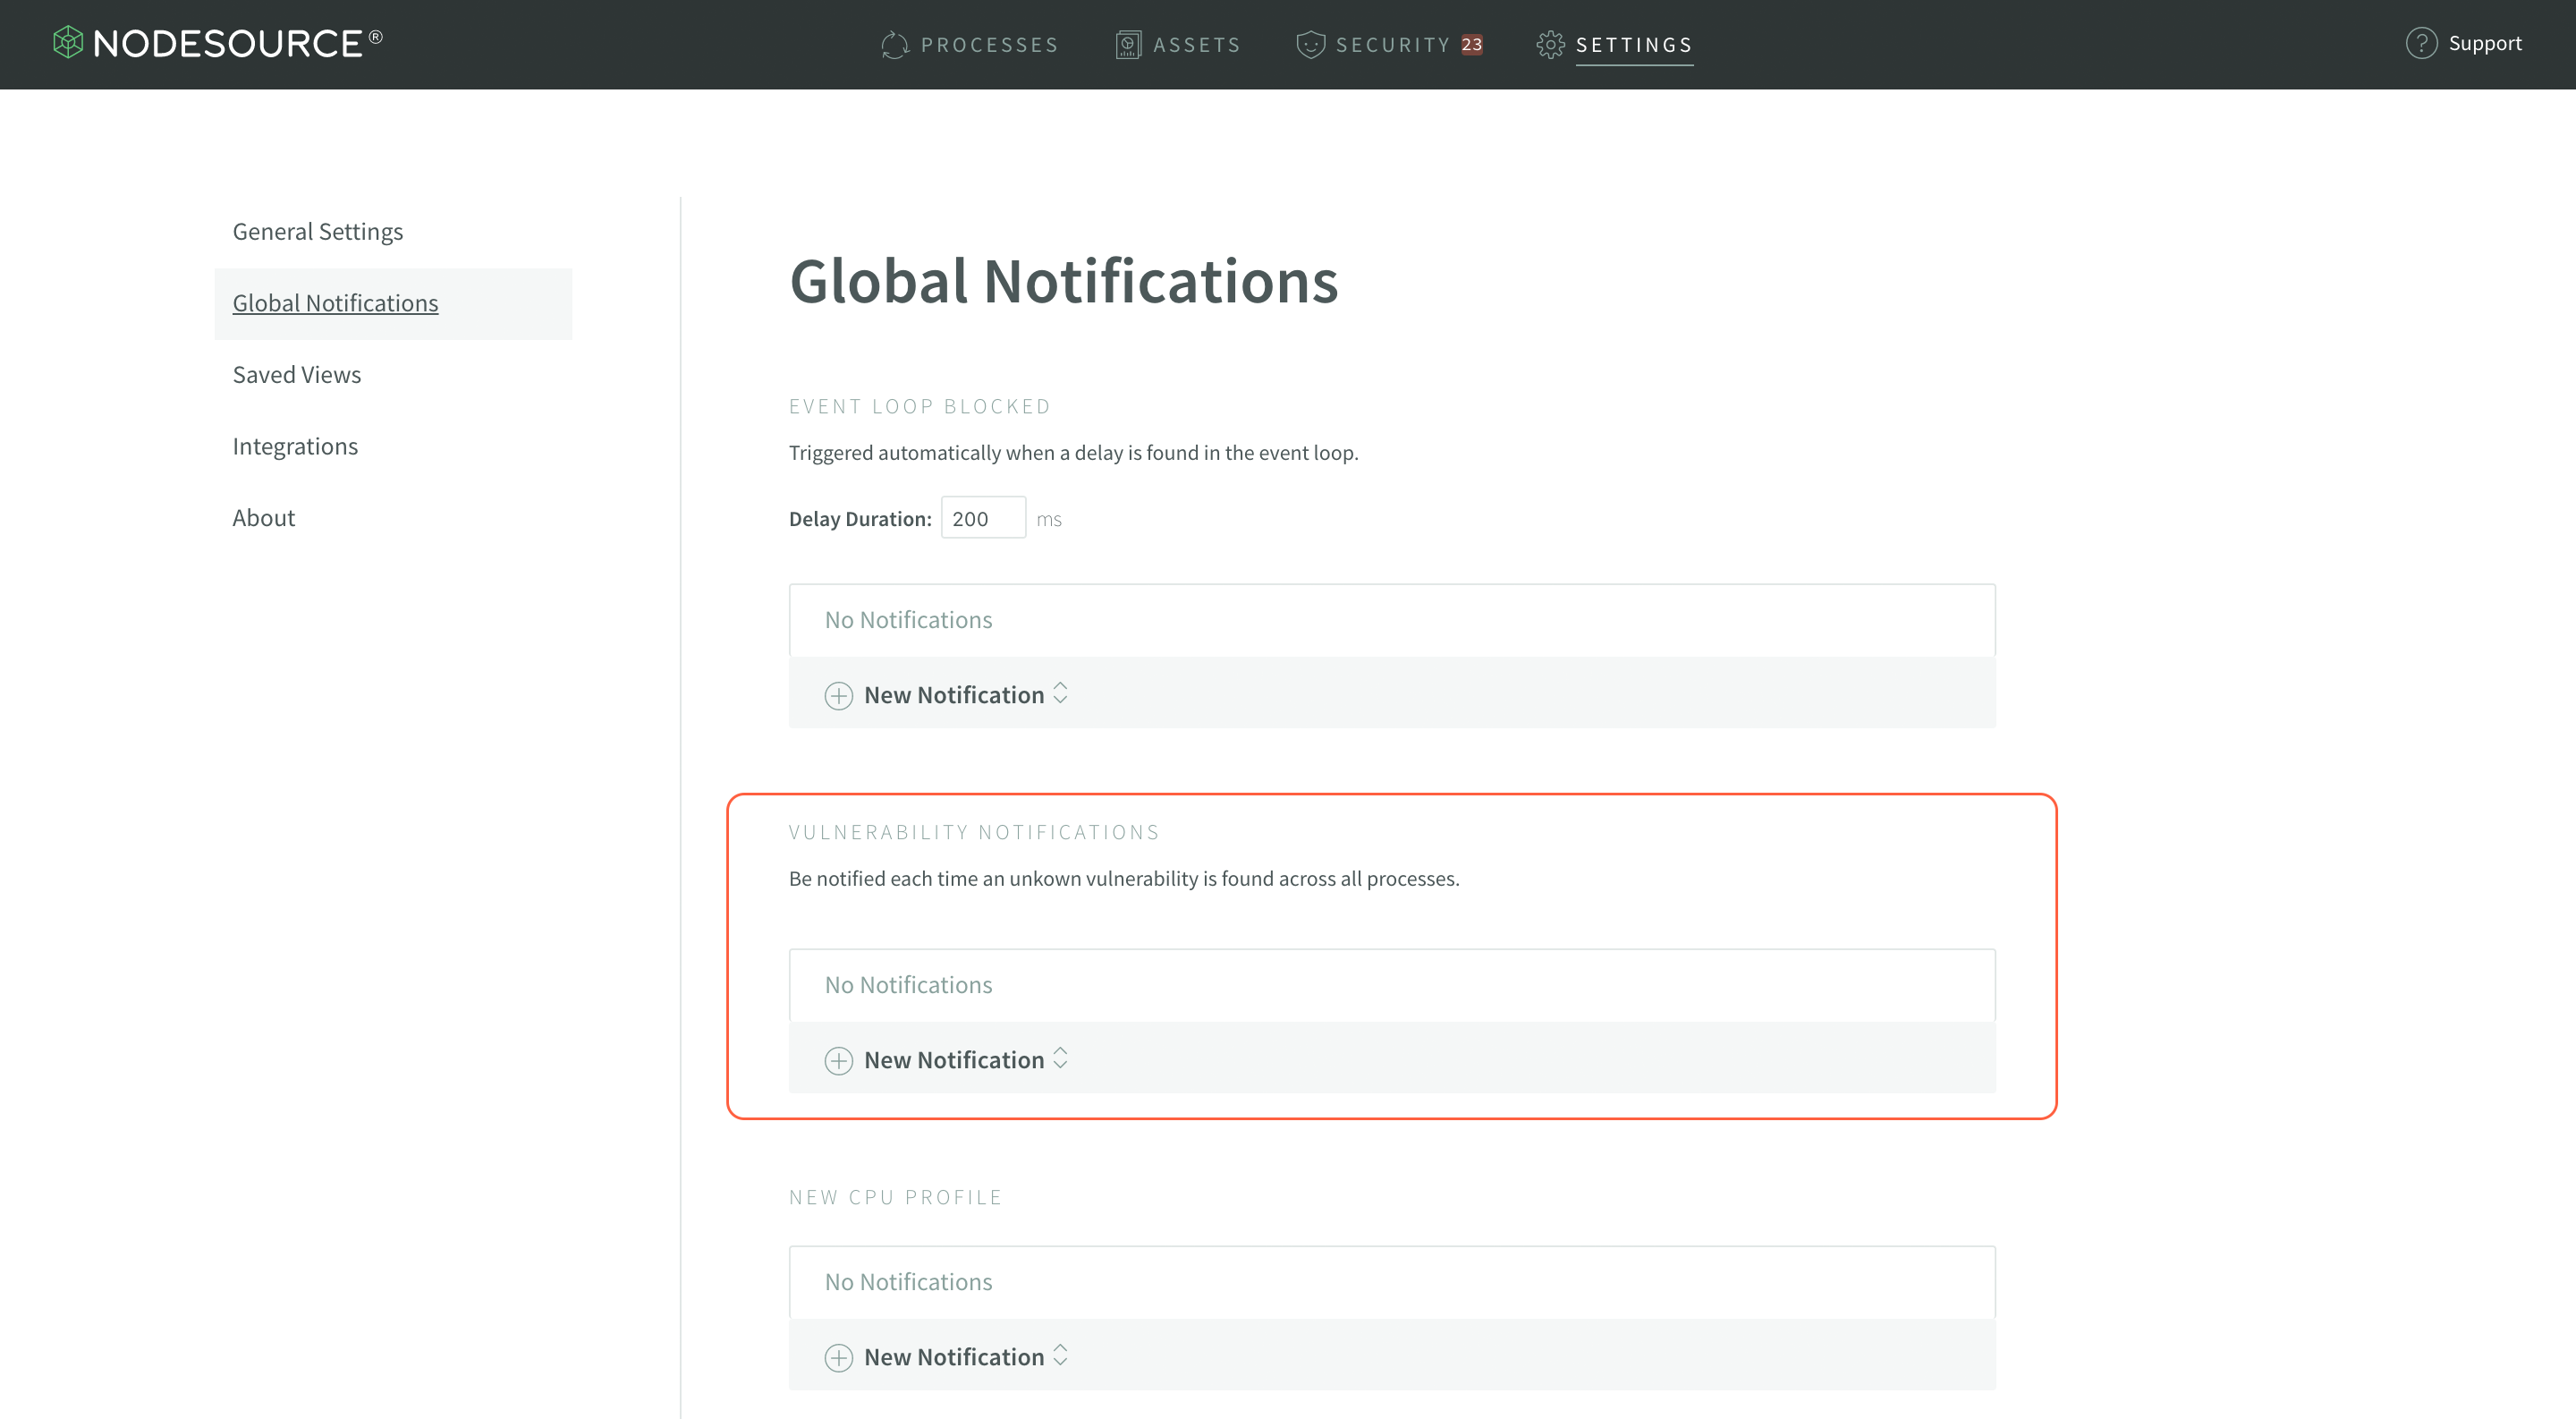
To set up Vulnerability Notifications, select the Notifications Settings link at the top of the N|Solid Console:
Once on the Global Notifications page, you’re going to want to configure a New Notification in the Vulnerabilities section:
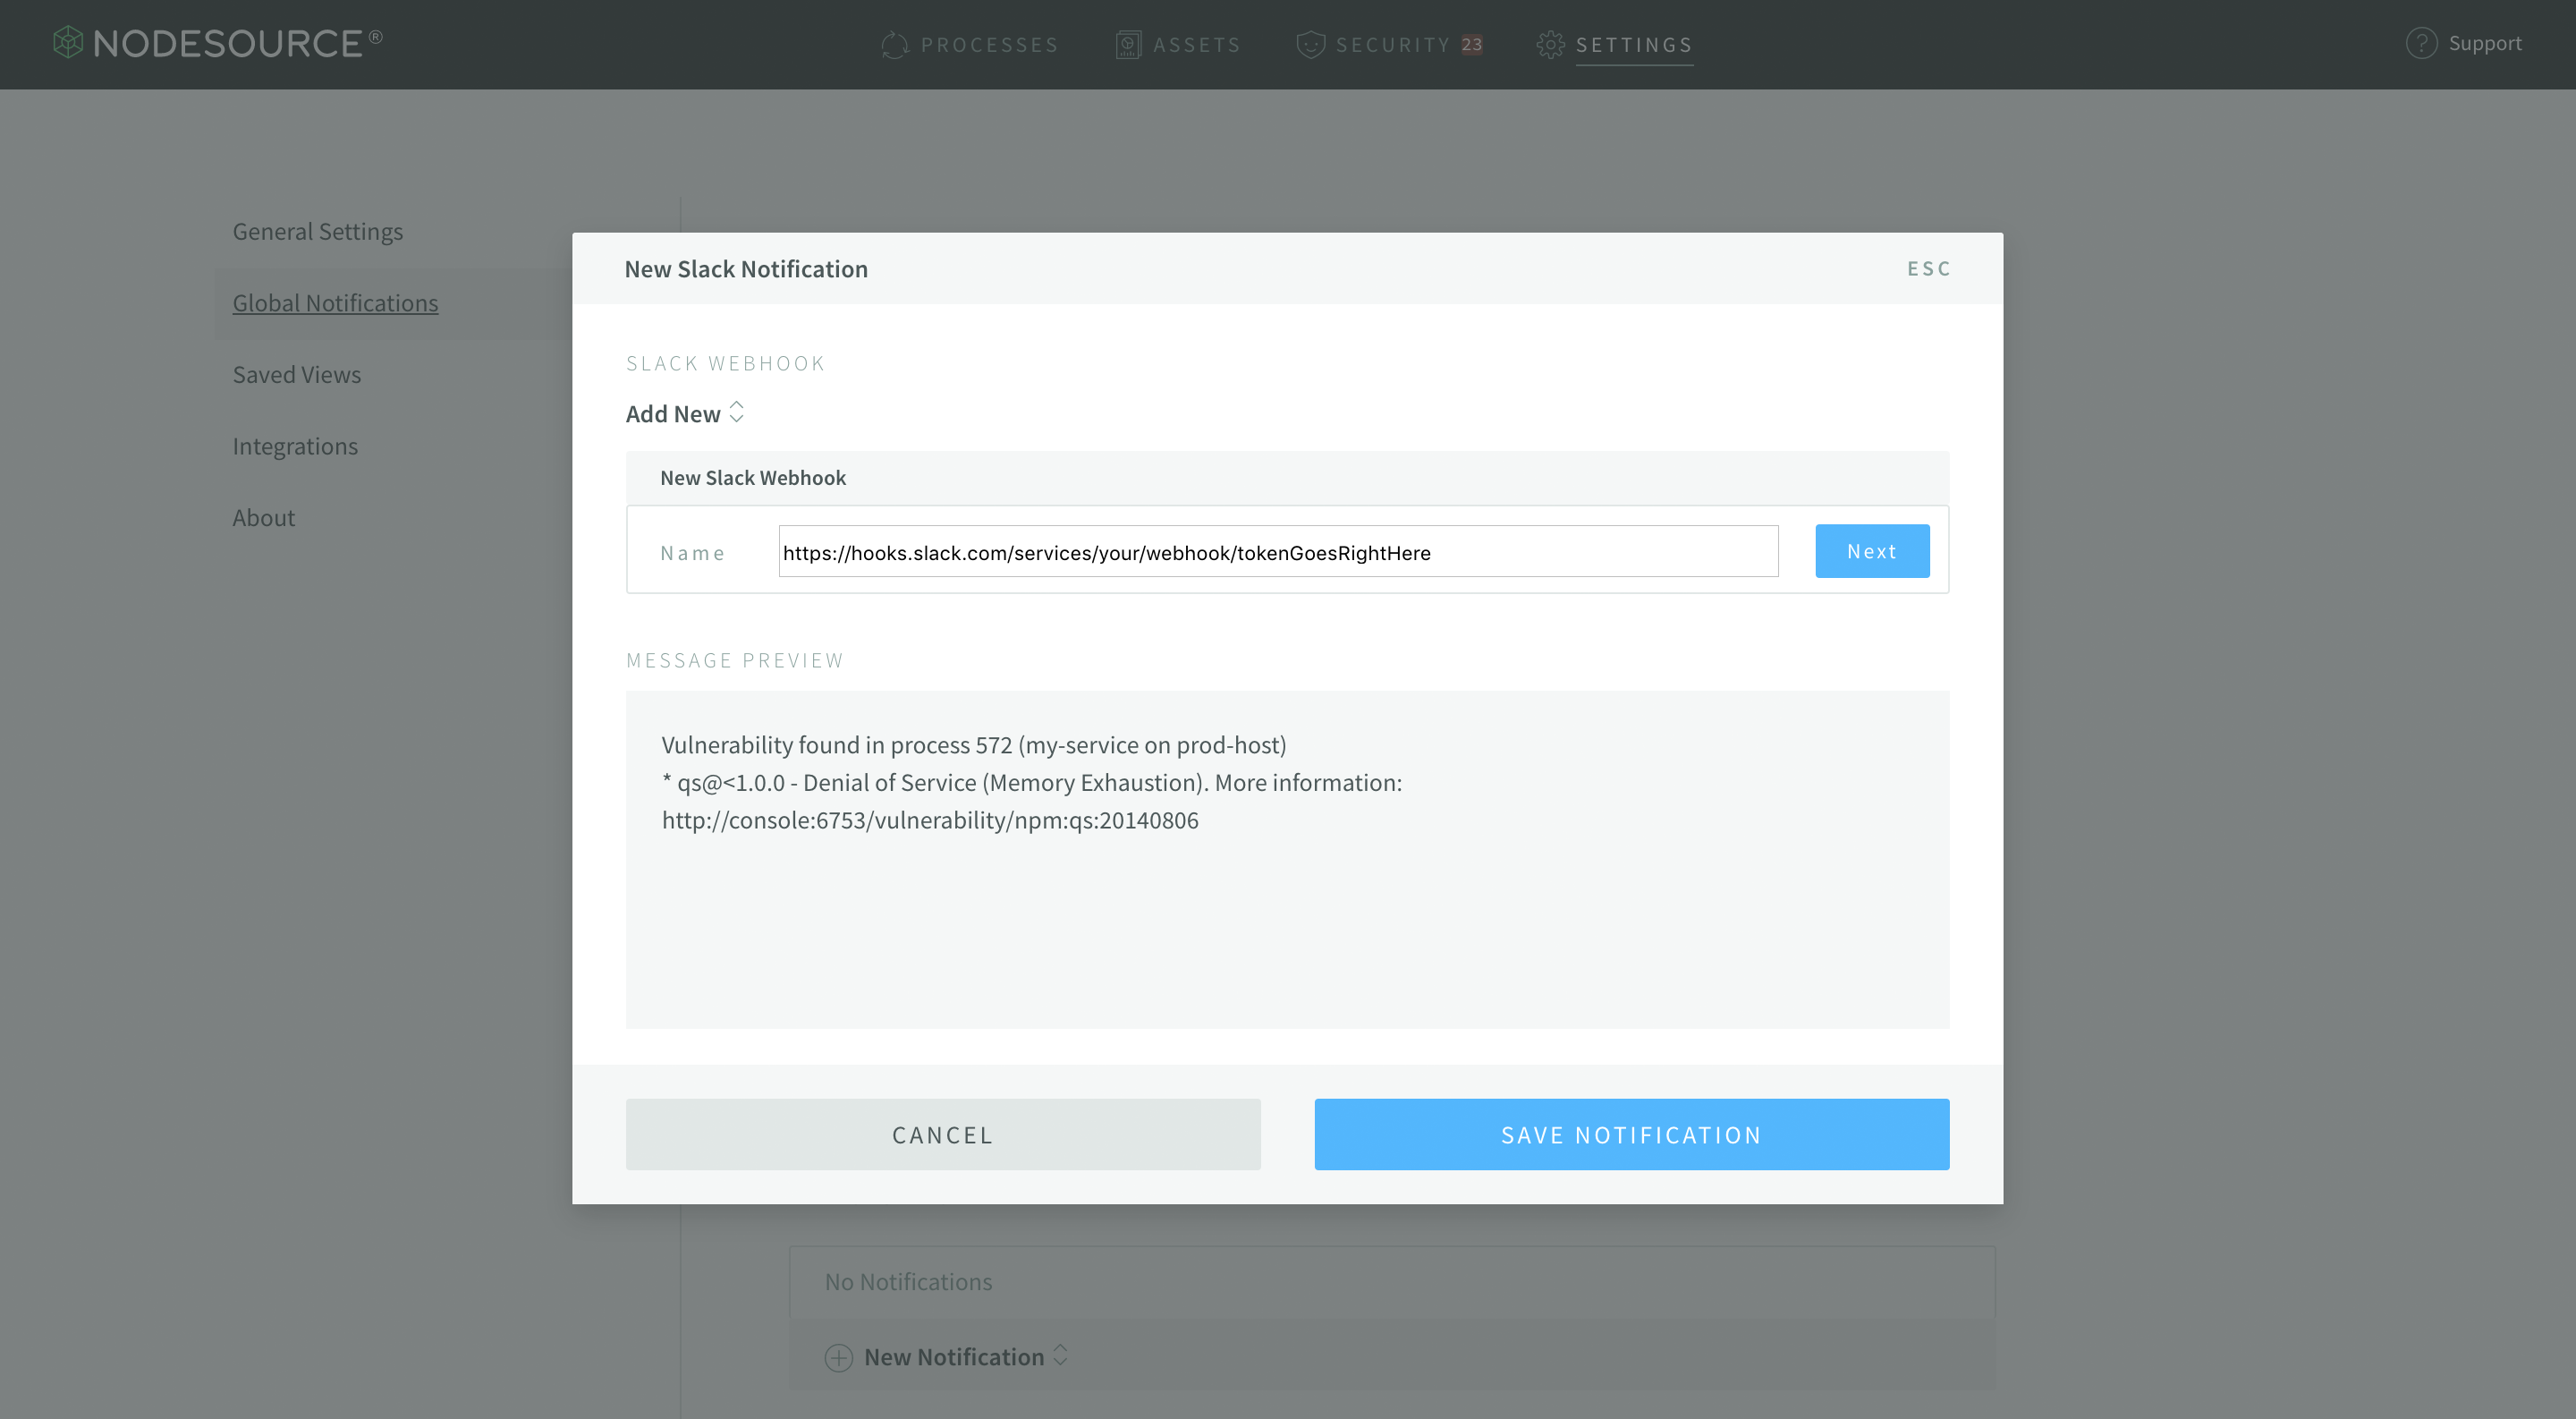
This will open up a drop-down from which you can select Slack Notification, Webhook, or Email. Each of the prompts is relatively similar, with Slack and the Webhook both needing a Webhook URL (you can create a new Slack Incoming Webhook url here) and email just needing an email address. For Slack notifications, simply paste your webhook into the text field:
Once you’ve set that up, you will begin to receive real-time notifications for when new known vulnerabilities are detected in your Node.js applications deployed with N|Solid!
What Next?
If you're already using or are interested in using N|Solid for vulnerability monitoring in your Node.js applications, the release of N|Solid 3.0 brought a neat new feature: Saved Views. You can actually create Saved Views in the console that focus on Vulnerabilities! If you'd like to learn more, be sure to check out our guide on creating and saving views in N|Solid 3.0.
If you're interested in using N|Solid, we'd be happy to chat - feel free to contact us if you've got any questions about the product. If you enjoyed this article, and would like to see more like it, be sure to let us know on Twitter!