11 Simple npm Tricks That Will Knock Your Wombat Socks Off
Using npm effectively can be difficult. There are a ton of features built-in, and it can be a daunting task to try to approach learning them.
Personally, even learning and using just one of these tricks (npm prune, which is #4) saved me from getting rid of unused modules manually by deleting node_modules and re-installing everything with npm install. As you can probably imagine, that was insanely stressful.
We've compiled this list of 11 simple-to-use npm tricks that will allow you to speed up development using npm, no matter what project you're working on.
1. Open a package’s homepage
Run: npm home $package
Running the home command will open the homepage of the package you're running it against. Running against the lodash package will bring you to the Lodash website. This command can run without needing to have the package installed globally on your machine or within the current project.
2. Open package’s GitHub repo
Run: npm repo $package
Similar to home, the repo command will open the GitHub repository of the package you're running it against. Running against the express package will bring you to the official Express repo. Also like home, you don’t need to have the package installed.
3. Check a package for outdated dependencies
Run: npm outdated
You can run the outdated command within a project, and it will check the npm registry to see if any of your packages are outdated. It will print out a list in your command line of the current version, the wanted version, and the latest version.

4. Check for packages not declared in package.json
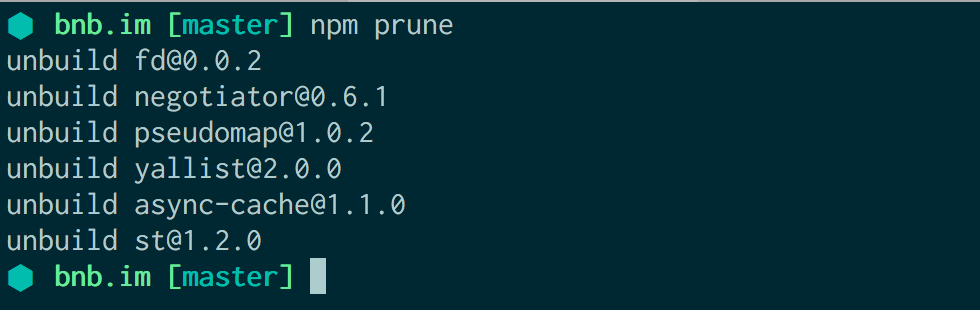
Run: npm prune
When you run prune, the npm CLI will run through your package.json and compare it to your project’s /node_modules directory. It will print a list of modules that aren’t in your package.json.
The npm prune command then strips out those packages, and removes any you haven't manually added to package.json or that were npm installed without using the --save flag.
Update: Thanks to @EvanHahn for noticing a personal config setting that made npm prune provide a slightly different result than the default npm would provide!
5. Lock down your dependencies versions
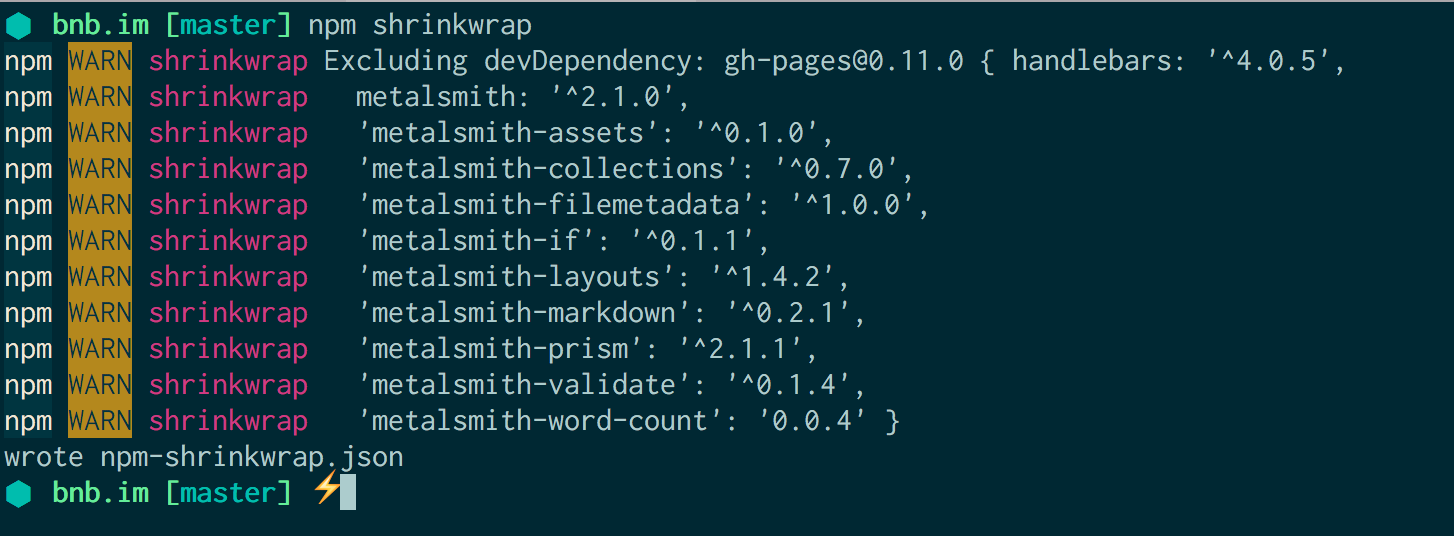
Run: npm shrinkwrap
Using shrinkwrap in your project generates an npm-shrinkwrap.json file. This allows you to pin the dependencies of your project to the specific version you’re currently using within your node_modules directory. When you run npm install and there is a npm-shrinkwrap.json present, it will override the listed dependencies and any semver ranges in package.json.
If you need verified consistency across package.json, npm-shrinkwrap.json and node_modules for your project, you should consider using npm-shrinkwrap.
6. Use npm v3 with Node.js v4 LTS
Run: npm install -g npm@3
Installing npm@3 globally with npm will update your npm v2 to npm v3, including on the Node.js v4 LTS release (“Argon”) ships with the npm v2 LTS release. This will install the latest stable release of npm v3 within your v4 LTS runtime.
7. Allow npm install -g without needing sudo
Run: npm config set prefix $dir
After running the command, where $dir is the directory you want npm to install your global modules to, you won’t need to use sudo to install modules globally anymore. The directory you use in the command becomes your global bin directory.
The only caveat: you will need to make sure you adjust your user permissions for that directory with chown -R $USER $dir and you add $dir/bin to your PATH.
8. Change the default save prefix for all your projects
Run: npm config set save-prefix="~"
The tilde (~) is more conservative than what npm defaults to, the caret (^), when installing a new package with the --save or --save-dev flags. The tilde pins the dependency to the minor version, allowing patch releases to be installed with npm update. The caret pins the dependency to the major version, allowing minor releases to be installed with npm update.
9. Strip your project's devDependencies for a production environment
When your project is ready for production, make sure you install your packages with the added --production flag. The --production flag installs your dependencies, ignoring your devDependencies. This ensures that your development tooling and packages won’t go into the production environment.
Additionally, you can set your NODE_ENV environment variable to production to ensure that your project’s devDependencies are never installed.
10. Be careful when using .npmignore
If you haven't been using .npmignore, it defaults to .gitignore with a few additional sane defaults.
What many don't realize that once you add a .npmignore file to your project the .gitignore rules are (ironically) ignored. The result is you will need to audit the two ignore files in sync to prevent sensitive leaks when publishing.
11. Automate npm init with defaults
When you run npm init in a new project, you’re able to go through and set up your package.json’s details. If you want to set defaults that npm init will always use, you can use the config set command, with some extra arguments:
npm config set init.author.name $name
npm config set init.author.email $email
If, instead, you want to completely customize your init script, you can point to a self-made default init script by running
npm config set init-module ~/.npm-init.js`
Here’s a sample script that prompts for private settings and creates a GitHub repo if you want. Make sure you change the default GitHub username (YOUR_GITHUB_USERNAME) as the fallback for the GitHub username environment variable.
var cp = require('child_process');
var priv;

var USER = process.env.GITHUB_USERNAME || 'YOUR_GITHUB_USERNAME';

module.exports = {

  name: prompt('name', basename || package.name),

  version: '0.0.1',

  private: prompt('private', 'true', function(val){
    return priv = (typeof val === 'boolean') ? val : !!val.match('true')
  }),

  create: prompt('create github repo', 'yes', function(val){
    val = val.indexOf('y') !== -1 ? true : false;

    if(val){
      console.log('enter github password:');
      cp.execSync("curl -u '"+USER+"' https://api.github.com/user/repos -d " +
        "'{\"name\": \""+basename+"\", \"private\": "+ ((priv) ? 'true' : 'false')  +"}' ");
      cp.execSync('git remote add origin '+ 'https://github.com/'+USER+'/' + basename + '.git');
    }

    return undefined;
  }),

  main: prompt('entry point', 'index.js'),

  repository: {
    type: 'git',
    url: 'git://github.com/'+USER+'/' + basename + '.git' },

  bugs: { url: 'https://github.com/'+USER'/' + basename + '/issues' },

  homepage: "https://github.com/"+USER+"/" + basename,

  keywords: prompt(function (s) { return s.split(/\s+/) }),

  license: 'MIT',

  cleanup: function(cb){

    cb(null, undefined)
  }

}
# One last thing...
If you want to learn more about npm, Node.js, JavaScript, Docker, Kubernetes, Electron, and tons more, you should follow @NodeSource on Twitter. We're always around and would love to hear from you!