8 Protips to Start Killing It When Dockerizing Node.js
Containers are the best way to deploy Node.js applications to production. Containers provide a wide variety of benefits, from having the same environment in production and development to streamlining deploys for speed and size.
Dockerizing your Node.js apps is awesome - but are you doing everything to make the process as reliable and vigorous as possible?
If you're deploying to production with Docker, we've made this list of 8 protips that will help improve your life both in development and production.
Quickstart: What Does a Basic Dockerfile Setup Look Like?
If you’ve used Docker before, skip down to Protip 1!
Here’s a quick Dockerfile to get up and running.
FROM nodesource/node:4

RUN mkdir -p /home/nodejs/app
WORKDIR /home/nodejs/app

COPY . /home/nodejs/app
RUN npm install --production

CMD ["node", "index.js"]
## What's going on in this Dockerfile?
FROM nodesource/node:4
This file starts by sourcing it’s base image from the offically supported and maintained NodeSource Docker Images. The specific image we are “pinning” to in this example comes from NodeSource, and provides our Docker image with the latest release in the v4 LTS branch of Node.js when building.
RUN mkdir -p /home/nodejs/app
WORKDIR /home/nodejs/app
Next, the Dockerfile creates a directory where we can place the source code for our Node.js application. WORKDIR is essentially a cd in the Dockerfile, from that line forward all commands will be executed in the context of our newly created directory.
COPY . /home/nodejs/app
Now that the Dockerfile has the directory, this line takes all the files in our build context and places them inside of our Docker image - in this specific case, think of the build context as the directory the Dockerfile lives in.
RUN npm install --production
Once the Dockerfile inserts the needed source code is into the Docker image, it installs the Node application's production dependencies from npm.
CMD ["node", "index.js"]
Finally, using CMD, the Dockerfile instructs Docker how to start the application when a container is created from the Docker image.
Running docker build -t myapp . will build from the Dockerfile, and will result in a Docker image with the application - as defined by the Dockerfile - inside!
For more information on Dockerizing Node.js Applications, check out the NodeSource Dockerizing Your Node.js Applications post.
Protip 1: Create a Non-root User
By default, the applications process inside a Docker container runs as a “root” user. This can pose a potentially serious security risk when running in production. There have been several documented cases of container “breakouts," where an application inside a container is able to escape and make changes in the host’s environment because it has root access.
A general rule of thumb is that the user’s id within a container will be the user id in the event of a breakout. This means user 0 (root) inside of a container will be user 0 (root) in the event of a breakout - which is less than ideal.
A simple solution to this problem is to create a new user inside of a Docker image and use that to execute the application. This means, in the event of a breakout, the application will be running as a non-root user - a dead-simple way to increase security of a Dockerized application in production.
It's possible to create a non-root user by adding this to a Dockerfile:
RUN groupadd -r nodejs \
   && useradd -m -r -g nodejs nodejs

USER nodejs
# Protip 2: Enable User Namespace Mapping
As of Docker 1.10, Docker has added User Namespaces to map the user id of the user inside the container to a different user id outside of the container - effectively working to prevent the same privileged breakout as Protip 1. Now Docker can map a user inside a container to a user id that has no privileges outside of the container - dramatically reducing the attack surface of production servers in the event of a breakout.
To use user namespace mapping, simply start a Docker daemon with the --userns-remap flag.
dockerd --userns-remap=default
# Protip 3: Start Caching `node_modules`
Like an onion, a parfait, or an ogre, Docker images have layers. These layers capture “mutations” to the filesystem much in the same way that git does. When looking at a Dockerfile, every RUN command creates a new layer to capture the files that were created, deleted, and mutated between the start and end of that command running.
- Docker commands create a new layer
- More layers equal larger container sizes
- Docker caches layers if no changes are made
- Similar to git style deltas
Layer creation can be leveraged to to cache portions of an application that rarely change, speeding up build times. This caching mechanism can be leveraged in a Node.js app - by caching its node_modules directory. By adding the app's package.json and running npm install before copying in the app's source files, npm install doesn't need to be run after every build.
COPY package.json .
RUN npm install --production
COPY . .
By adding this to a Dockerfile, npm install will only ever be run when building if the application's package.json changes!
Protip 4: Add a Process ID Safety Net
The first process inside of a Docker container will be PID 1. The Linux kernel gives PID 1 special treatment, and many applications were not designed to handle the extra responsibilities that come with being PID 1. When running Node.js as PID 1, there will be several manifestations of the process failing to handle those responsibilities, the most painful of which is the process ignoring SIGTERM commands.
In Docker, the philosophy of “one process per container” is built around the concept of keeping the individual components of an application stack scalable and individually deployable. A simple init process could be added that's designed to run as PID 1 into a Docker container without breaking that philosophy.
This is where dumb-init comes in. Most init systems - such as upstart and systemd - are heavy handed and break the simplicity of the “one process per container” philosophy, while dumb-init was designed to be a super simple process that handles the responsibilities of running as PID 1 for whatever process it is told to start.
We can bake dumb-init into a Docker image by adding this to its Dockerfile:
ADD https://github.com/Yelp/dumb-init/releases/download/v1.1.1/dumb-init_1.1.1_amd64 /usr/local/bin/dumb-init
RUN chmod +x /usr/local/bin/dumb-init

CMD ["dumb-init", "node", "index.js"]
# Protip 5: Tag Docker Images When Building
Once a Dockerfile is defined, building the Docker container is the next step before running the contained application.
docker build .
When run in the same directory as the Dockerfile, the command will generate the instructed Docker image. In order to properly manage and maintain a deterministic build and an audit trail of a container, it is critical to create a good tagging strategy. Tagging allows tracking of Docker images to prevent confusion when running through the build process.
This can be accomplished with the -t argument.
docker build -t appnamespace/app:0.0.1 .
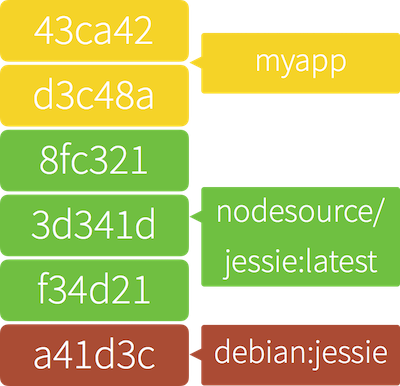
Rolling version tags and keeping track can be difficult. One strategy to keep things organized is to pin the Docker image to the $SHA1 of the current commit within the application’s git repository.
Protip 6: Enable Process Management Outside of the Container
In the event an application's process crashes, a mechanism is needed to restart it. Docker introduces a paradigm shift with its best practices: one process per container. Unfortunately tools like pm2 or forever require being inside the container, breaking this rule.
It is recommended that the process is restarted at the container level, rather than from within the container. This has the advantage of requiring a single tool for all containers, regardless of what's running inside. This can be leveraged by an agnostic tool like systemd or upstart.
Protip 7: Use the Production Image as a Base Image
One of the largest benefits of using Docker is the ability to run large portions of their infrastructure locally on development machines. When using Docker images for local development, there will be constant pressure to add developer tooling into the Docker images.
An easy way to get large wins from Docker is to keep images linear. This means when building Docker images for use in CI/CD, development, and so on, the production Docker image should be used as the base image, and any extra tooling should be added as layers on top.
The benefit of this inheritance model - where development images inherit the environment from the production image - is that all the tests, code coverage, and linting are being run in the same environment that will be pushed into production.
As a team increases its use of Docker, this practice ends up yielding a much better developer experience. When this pattern is used, bugs that manifest themselves in an application's production images will nearly always manifest themselves in the developer images as well.
Protip 8: Fixing Time Drift in Docker
More than likely, Linux isn't being used for 100% of an application's development. This means Docker will be running in a virtualized environment, and this environment will have it’s own clock that may not be in sync with the host. For time series datasets, this can cause super strange bugs to manifest during local development.
Docker is bringing about the Year of the Small Linux Inside Larger Linux Inside Virtualbox inside Mac OS X On The Desktop
— Spearownolactone (@stillinbeta) November 20, 2015
Keeping the local environment's clock in sync with the host is simple. From the host machine, run:
docker-machine ssh [docker_machine_name] ntpclient -s -h pool.ntp.org
# One last thing… If you're interested in Node.js, Docker, Container, or other modern development tools, you should follow [@NodeSource](https://twitter.com/nodesource) on Twitter. We're always around, and want to hear from you!